There are 2 ways to trigger post interaction voice surveys in Genesys Cloud using CX Index:
- Method 1: Post Interaction Agent Transfer
- Method 2: Post Interaction Callback Survey
Method 1: Post Interaction Agent Transfer IVR Surveys
Agent clicks the button that transfers the interaction participant to the survey.
Step 1: Build an IVR survey within CX Index
Using the steps given in the following articles, create an IVR survey (Create a survey) and add questions (Add questions to a survey). The questions can be used as voice prompts in Genesys Cloud.
When creating the survey, note the survey and question IDs. These will be important when you build the survey flow in Genesys Cloud.

In the configuration stage (Configure a survey), ensure that the Channel field on the General tab is set to IVR.
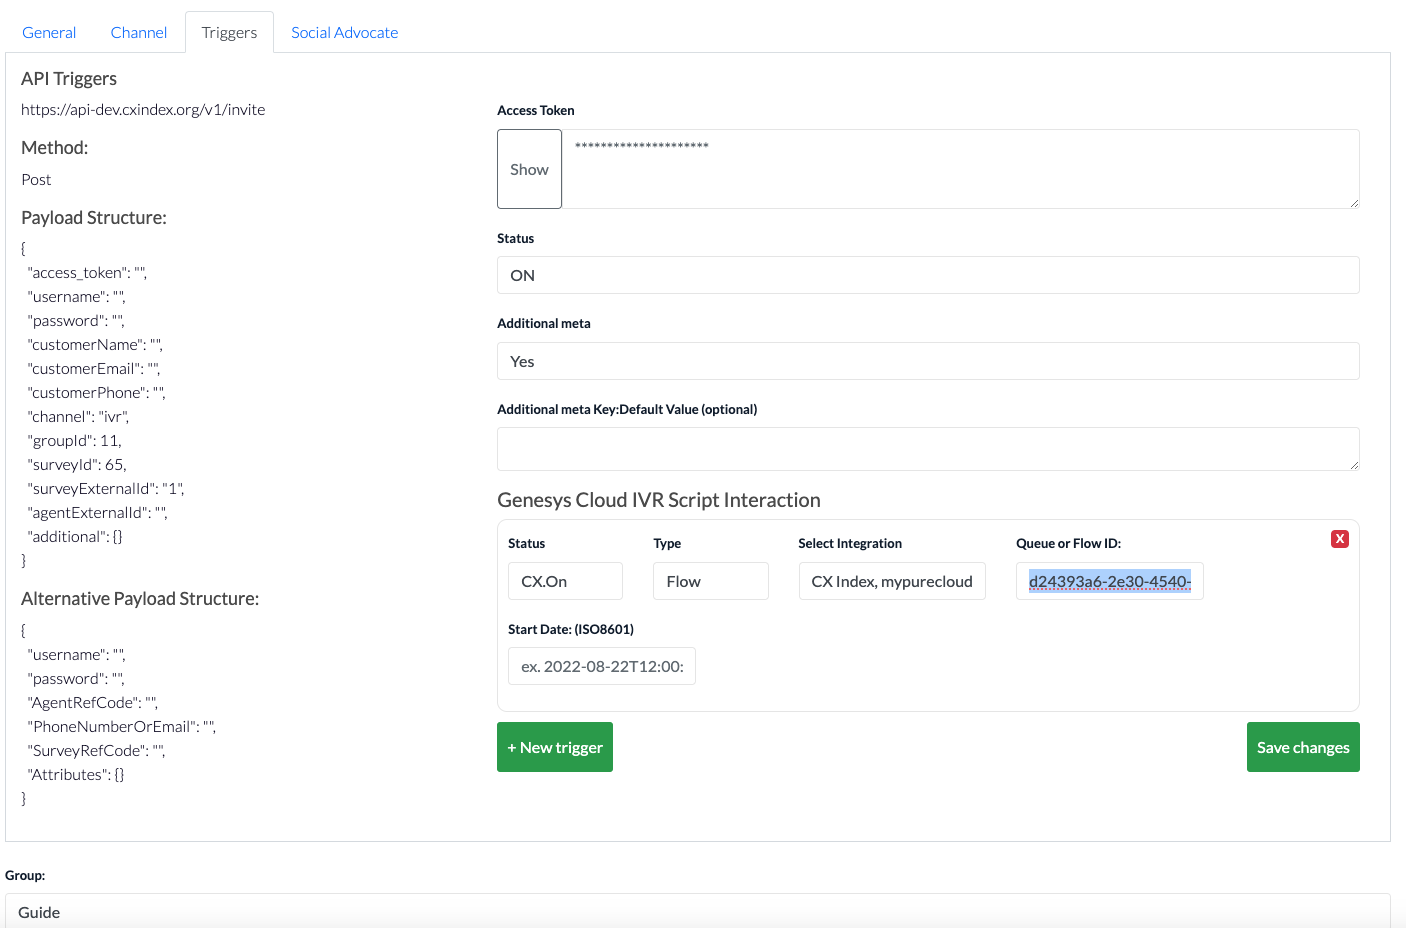
Add trigger with integration, queue or flow and start date in ISO format (ISO8601) like the example below:
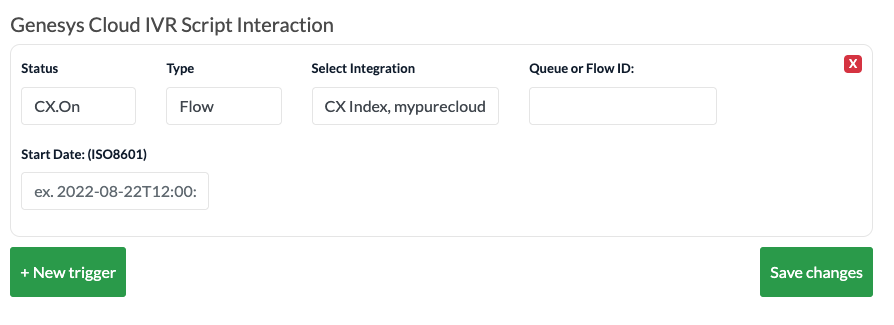
Assign a queue ID or Flow ID to the trigger. Queue and flow ids can be easy obtained from the Genesys Cloud URL:
Click Save changes.
Step 2: Configure the flow with the survey inside Genesys Cloud
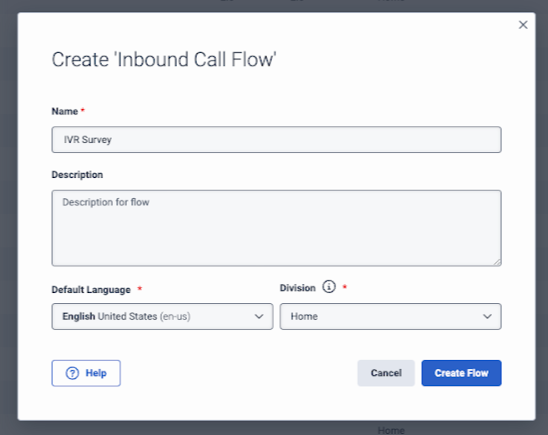
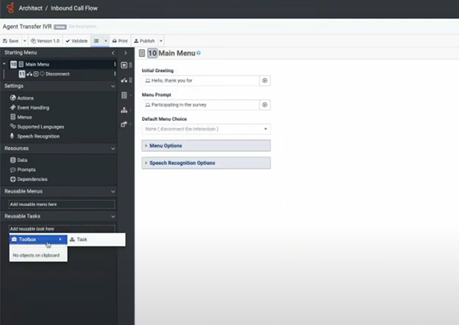
From the Admin page of Genesys Cloud, select Architect and add an Inbound Call Flow. Fill in the fields with the relevant information for the survey you created in CX Index.
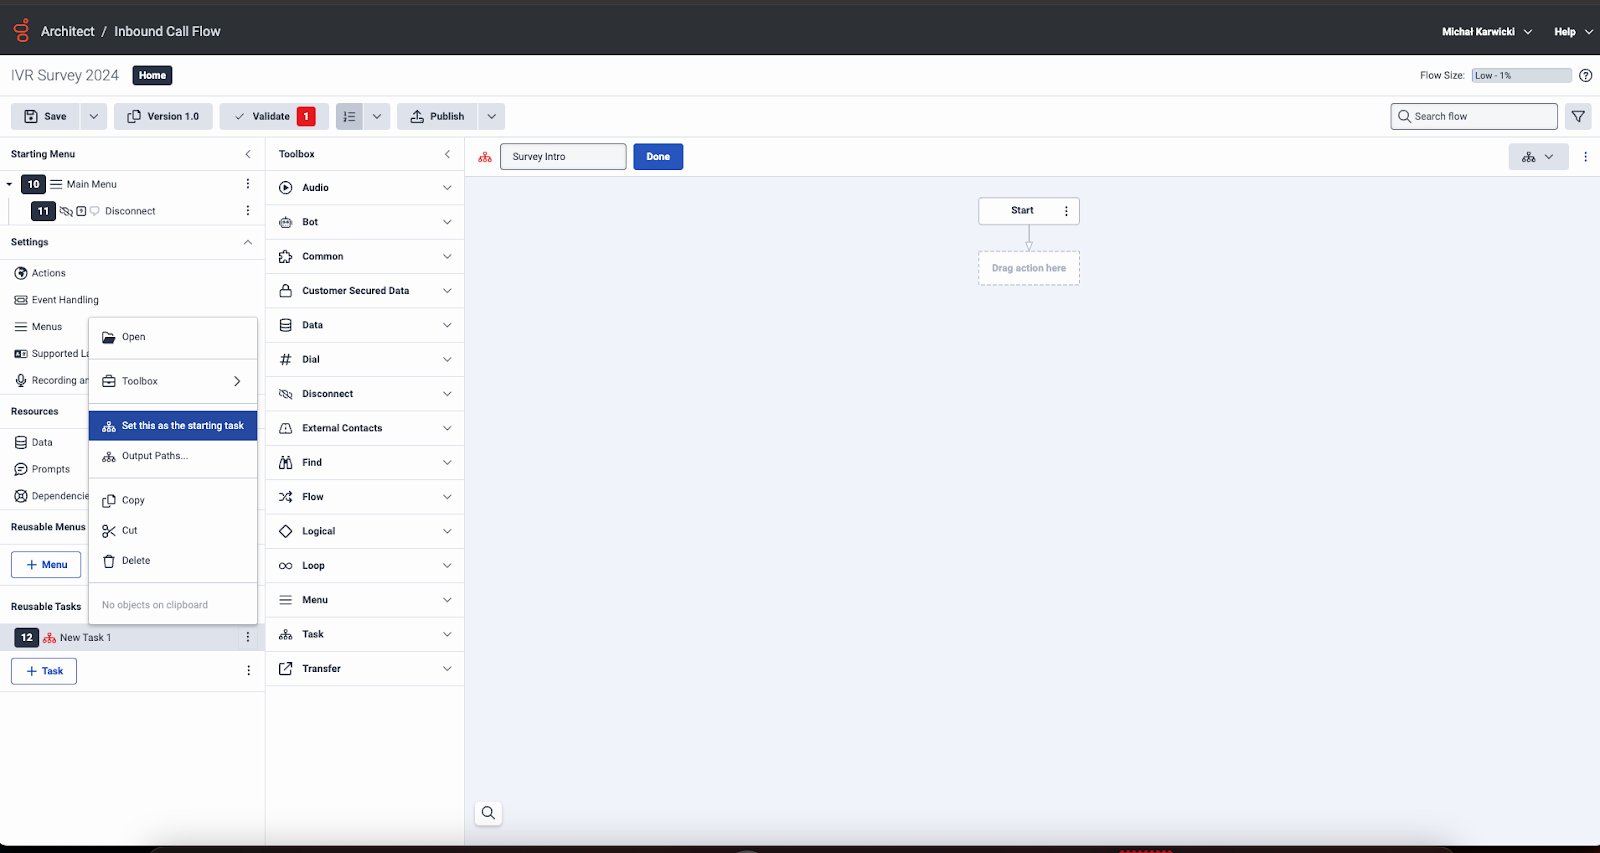
Design the flow so it fits your requirements.
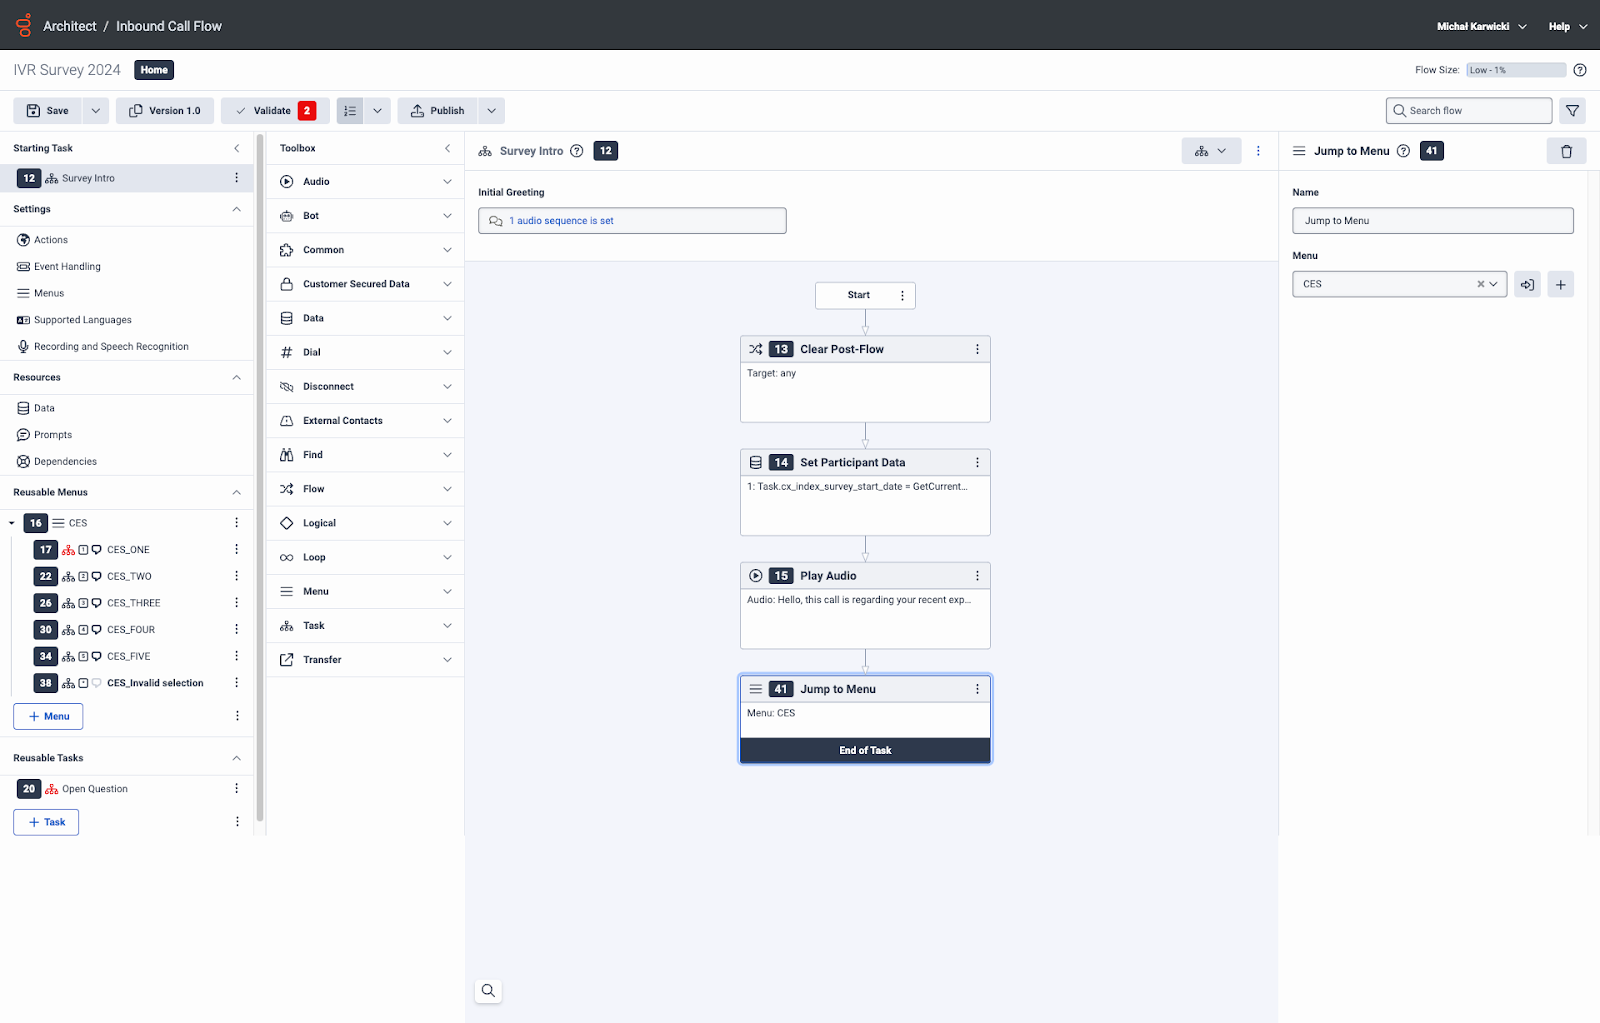
You should remove the initial menu and replace with a reusable task called Survey Intro. You can also remove the main menu.
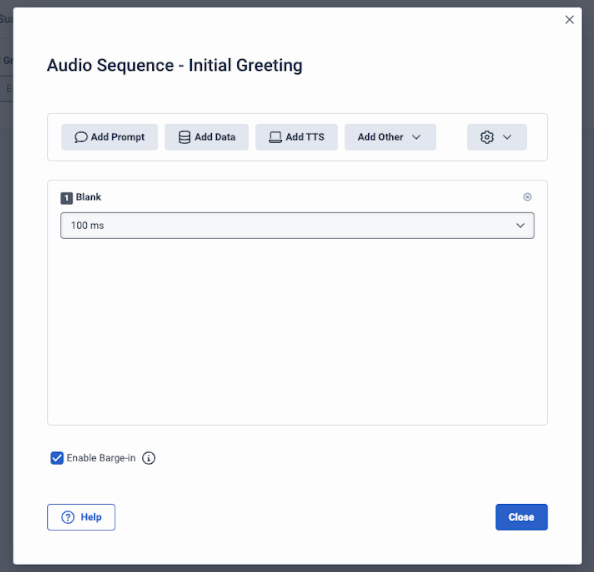
In survey intro task, edit the initial greeting to have a blank 100ms audio.
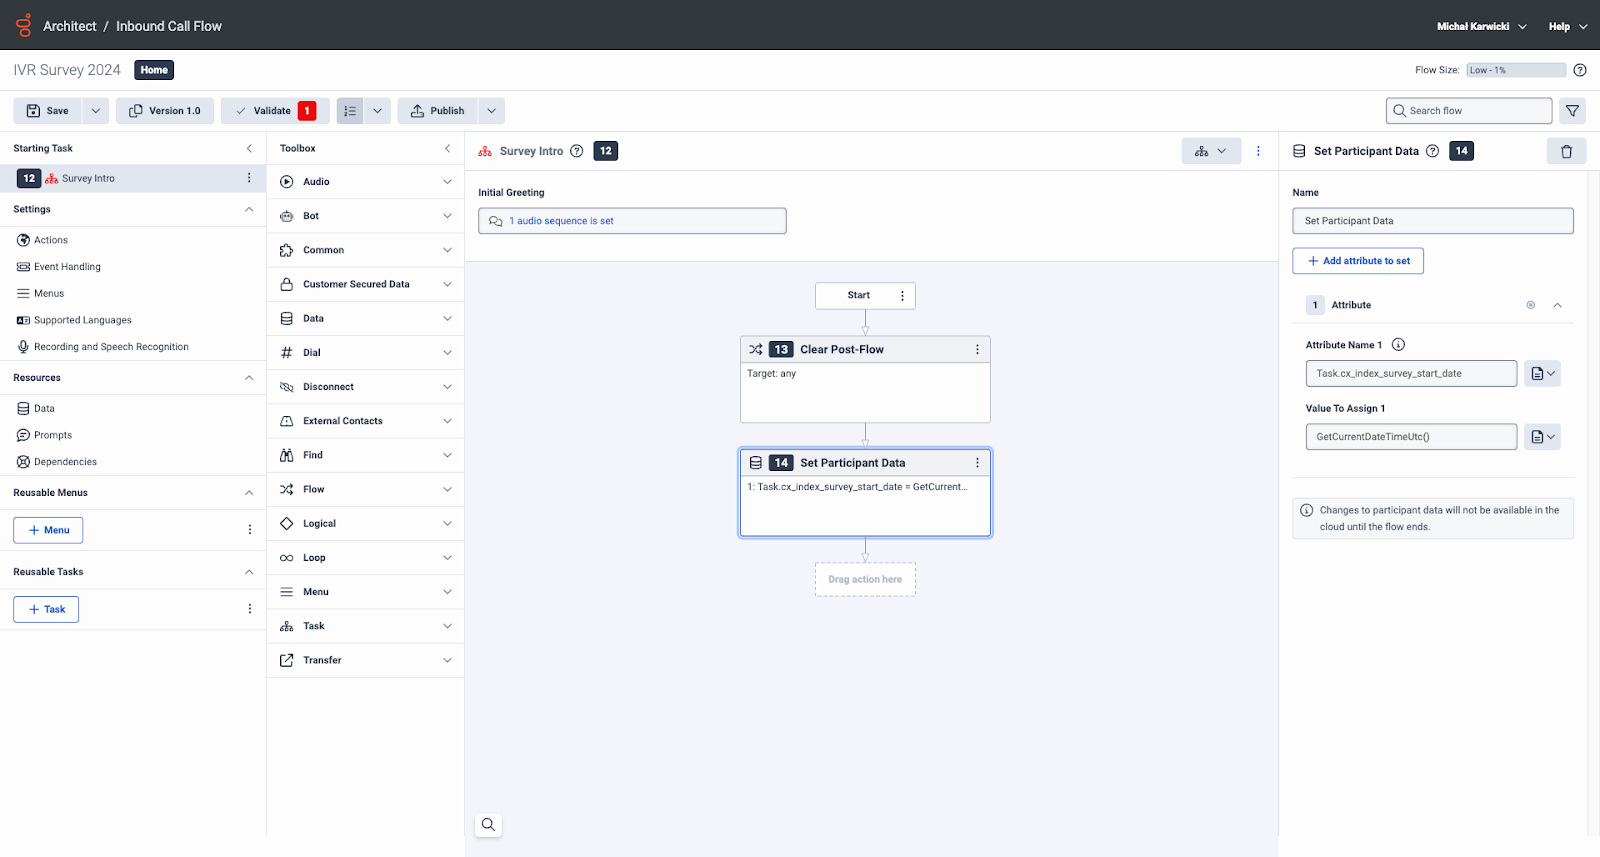
As the first block, add a clear post flow. Set the participant data block with the attribute and value:
- Attribute name: Task.cx_index_survey_start_date
- Value to assign: GetCurrentDateTimeUtc()
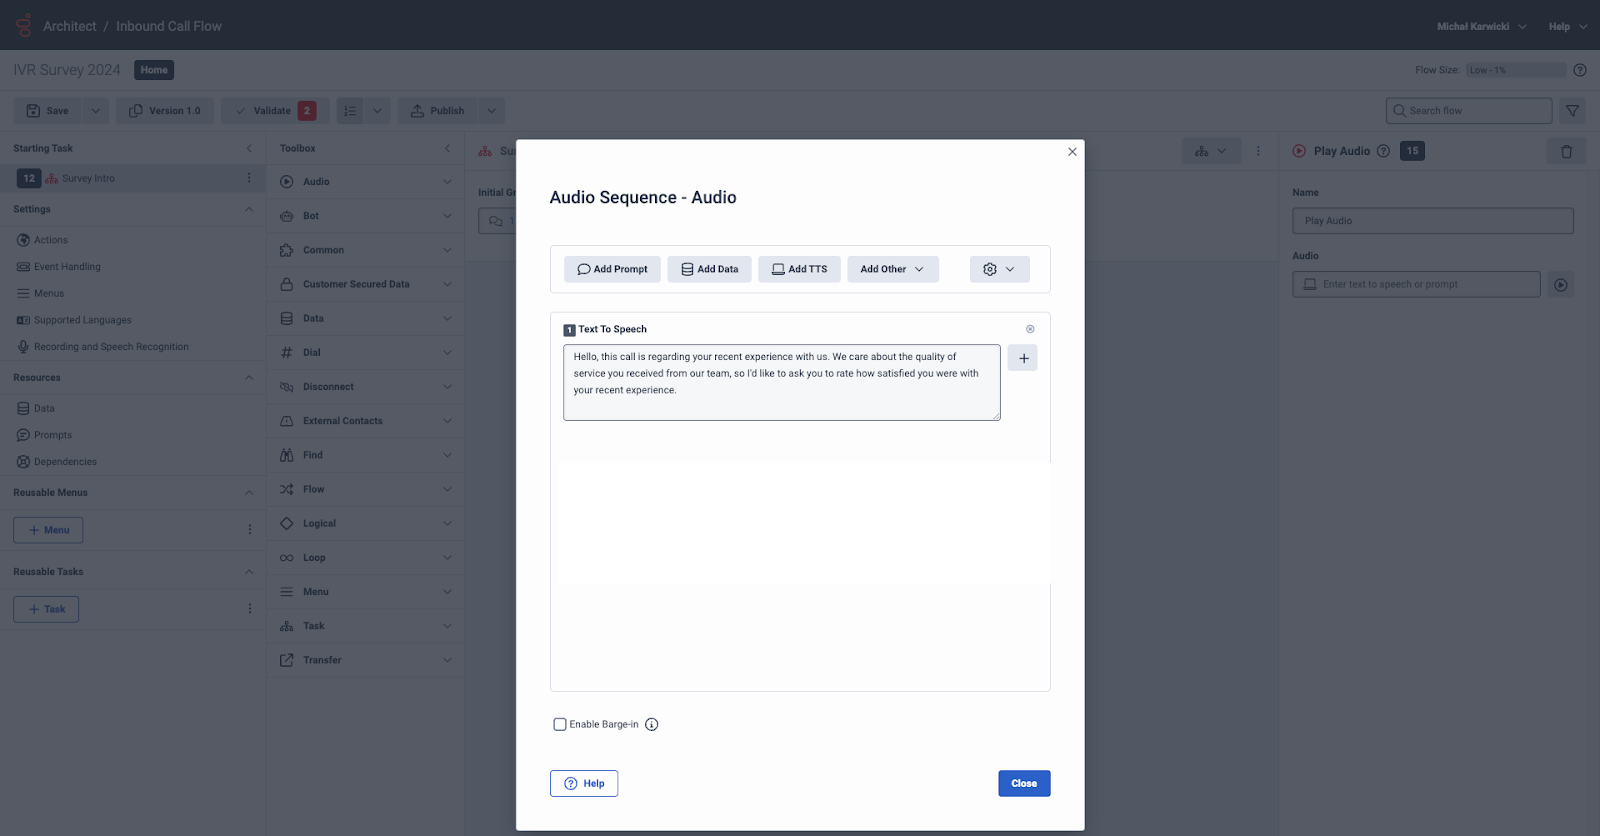
Next, you can add the introductory message and survey questions.
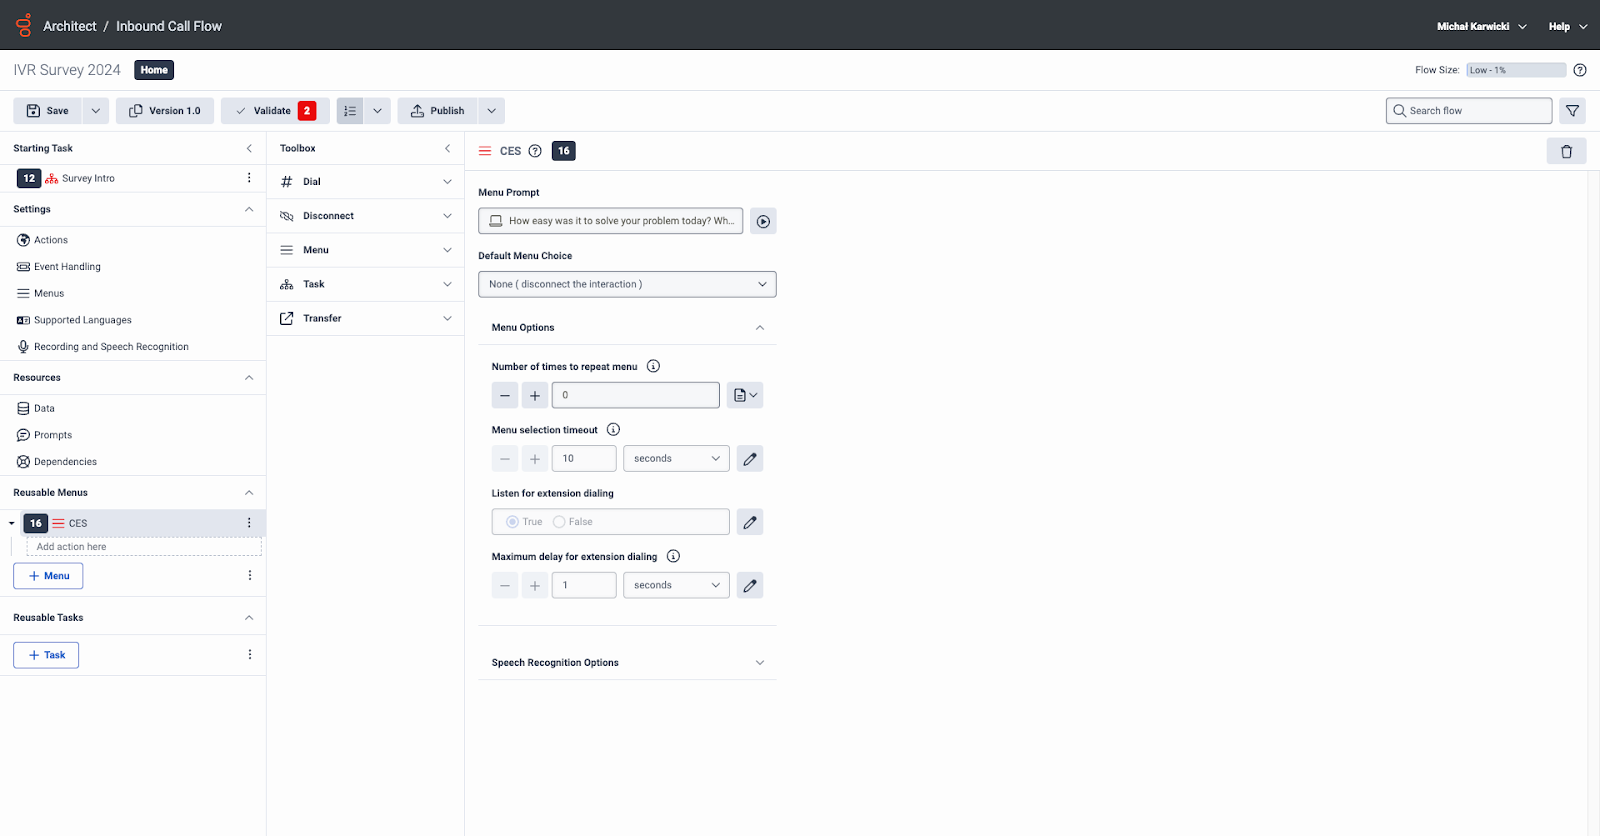
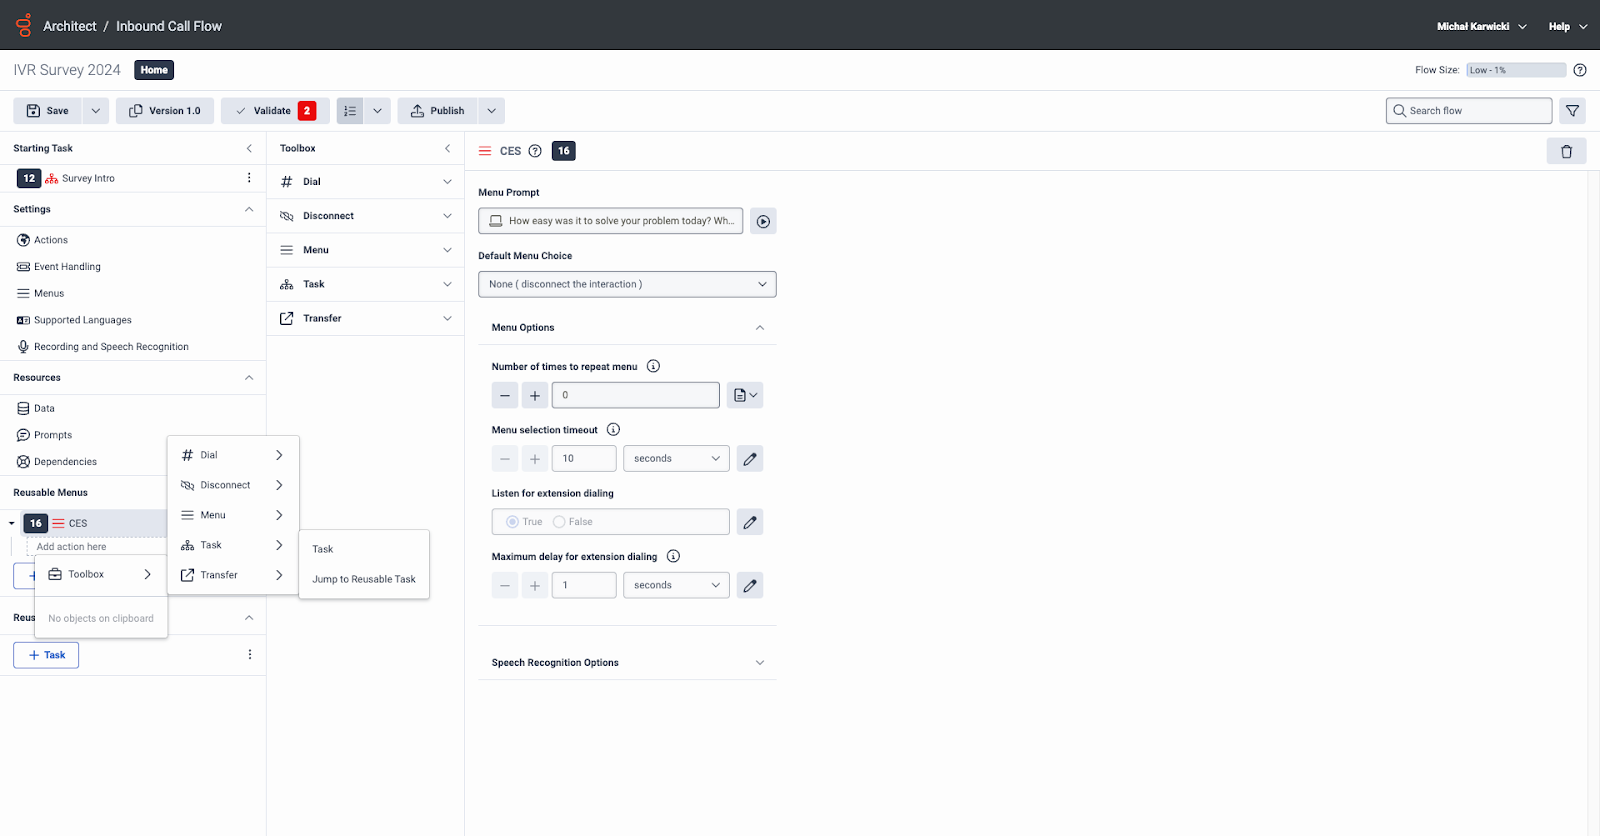
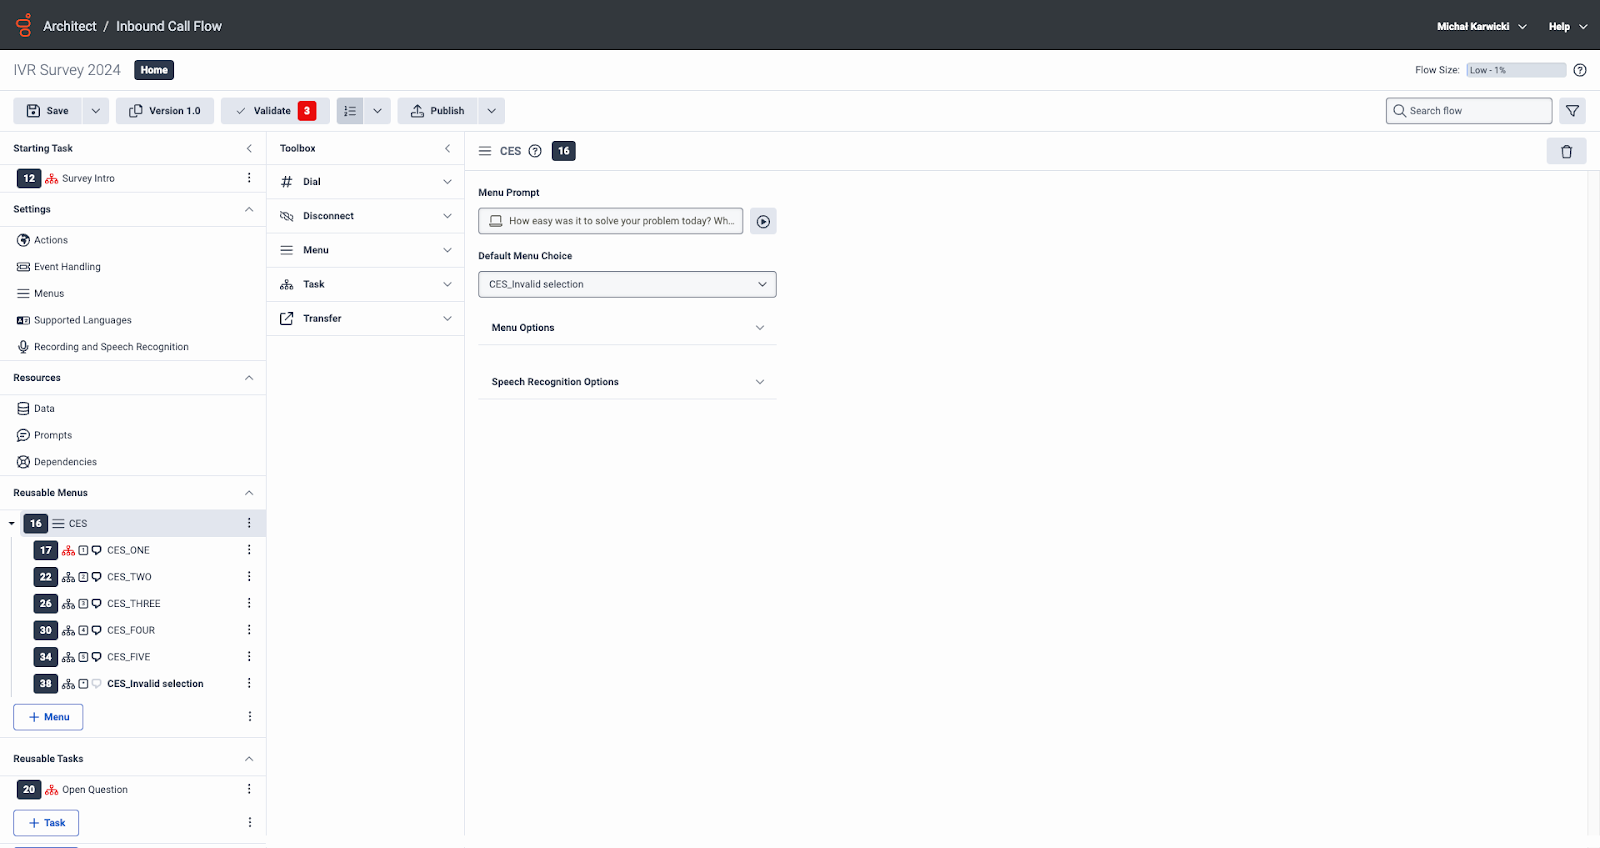
Add a menu labeled with the metric being used in the survey (i.e., NPS, CSAT, CES) and add the appropriate question prompt. Be sure to configure the menu not to repeat itself.
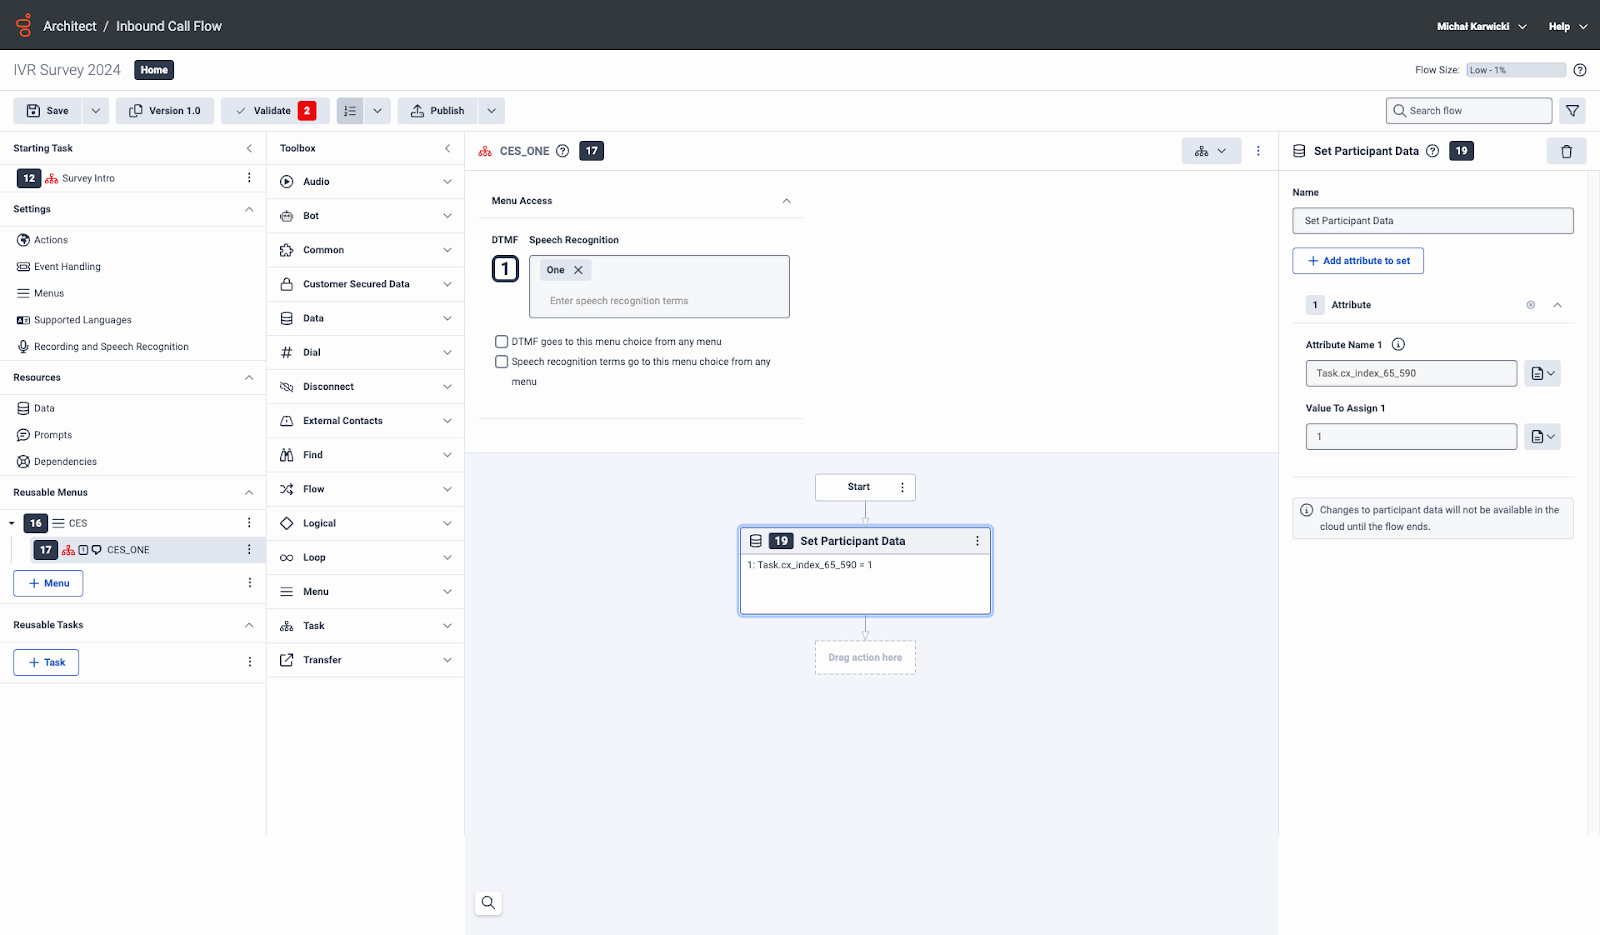
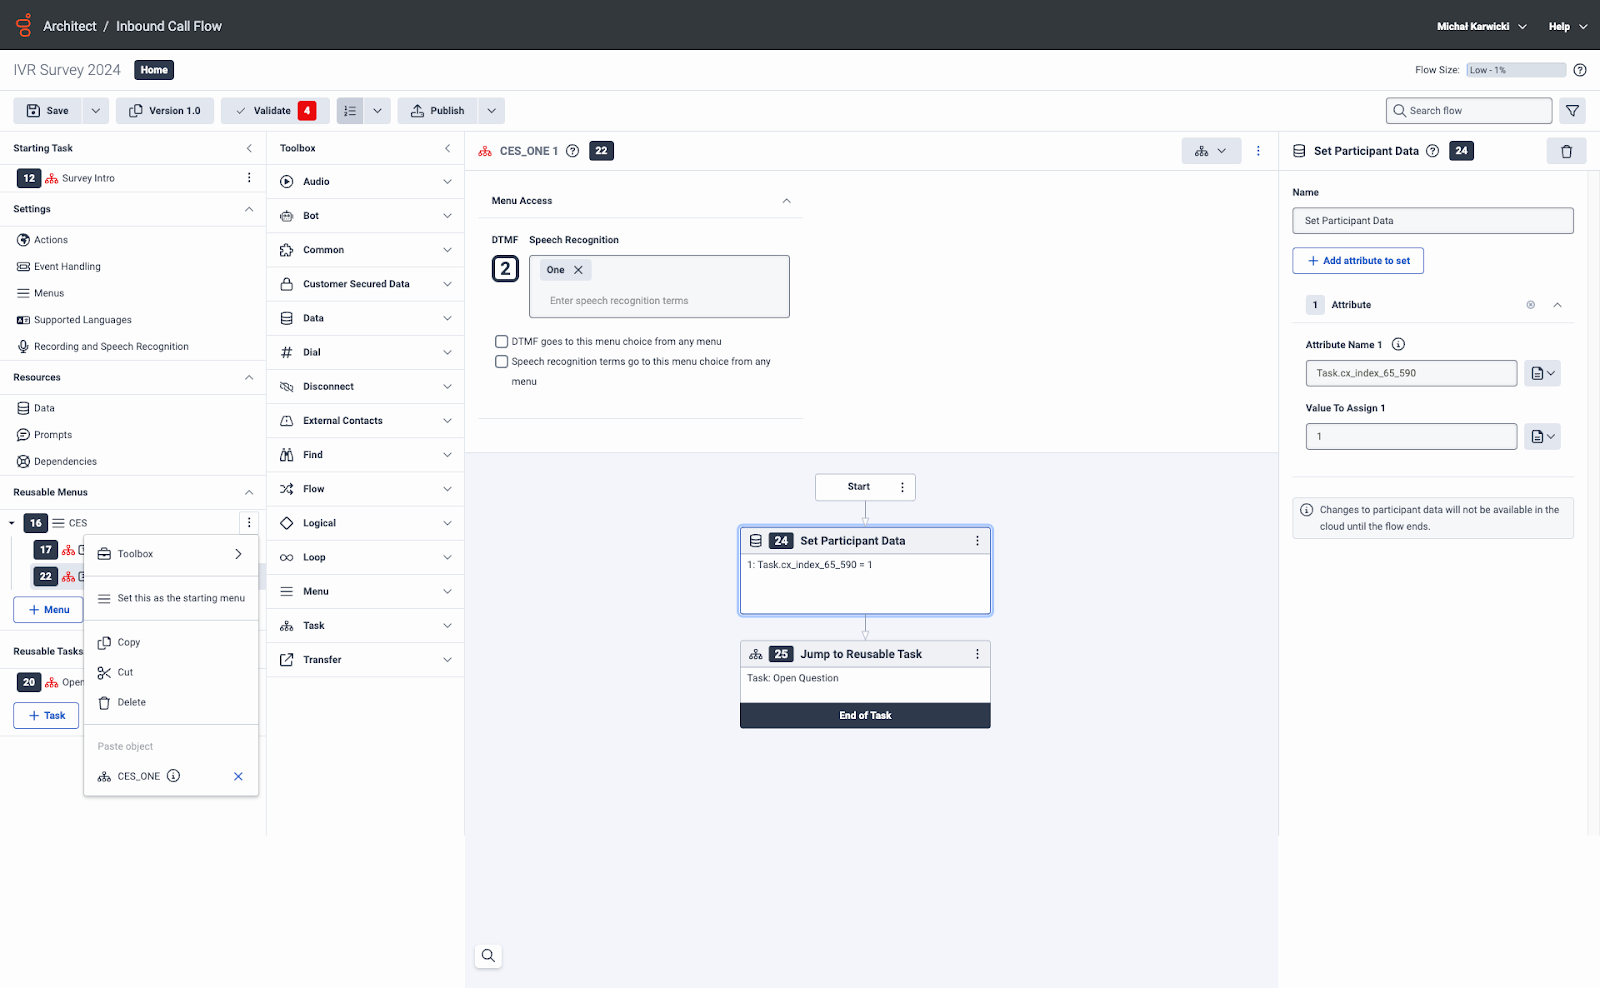
Under the menu you've created, add the relevant tasks for the initial response option (i.e., CES_One).
Now you should create a block and set participant name with the appropriate question and survey IDs from CX Index. For example:
- Attribute name 1: Task.cx_index_65_590
- Value to assign 1: 1
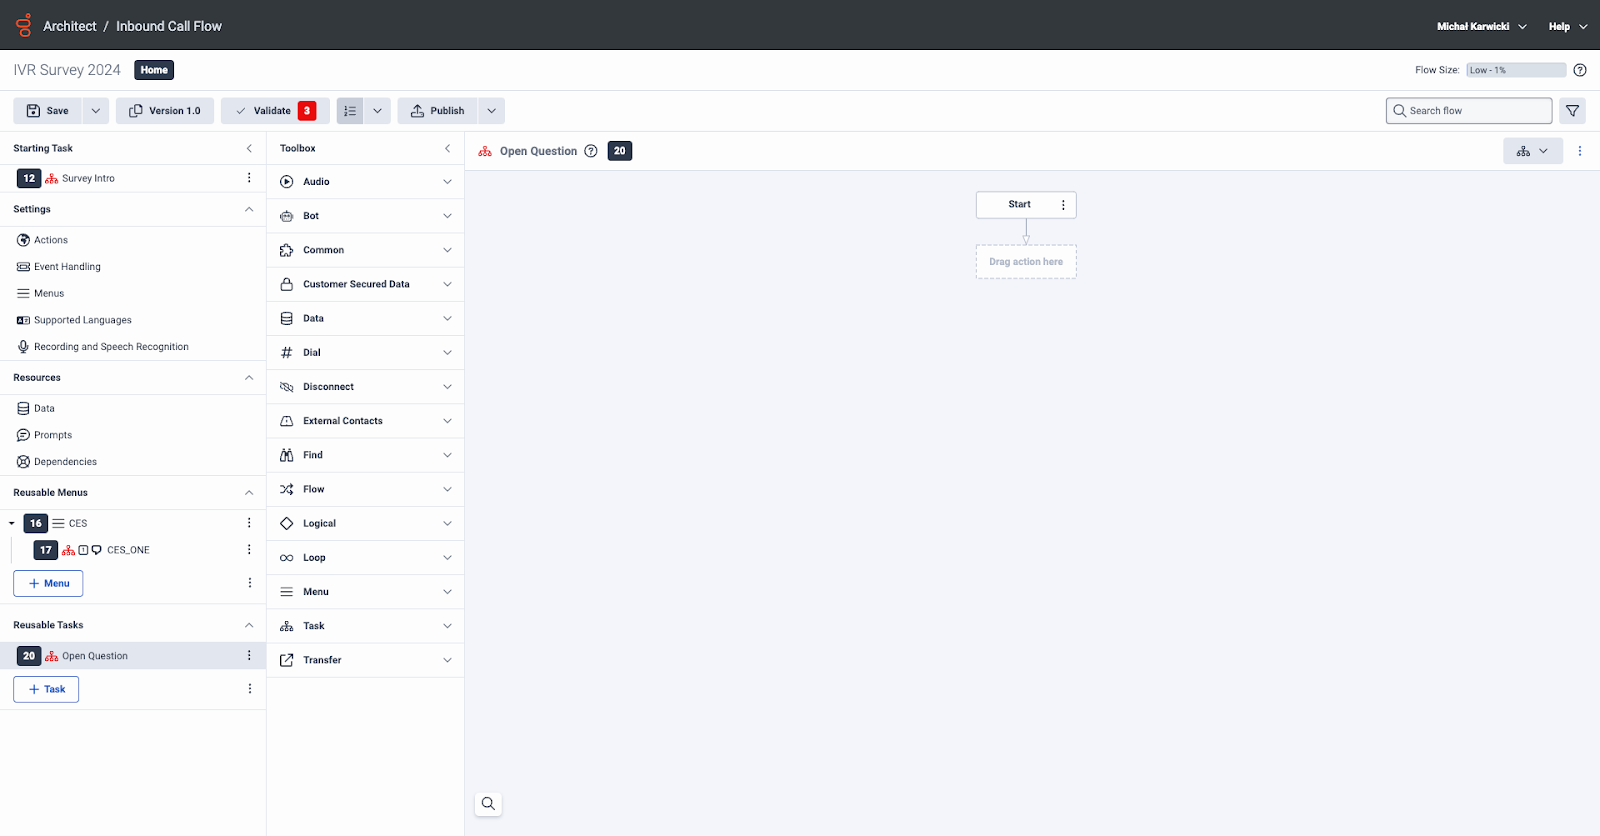
Now add a task for the open ended question. (You can skip this step if you do not plan to ask an open ended question).
Go back to the previously created response task and add the last block that will transfer to the open ended question task:
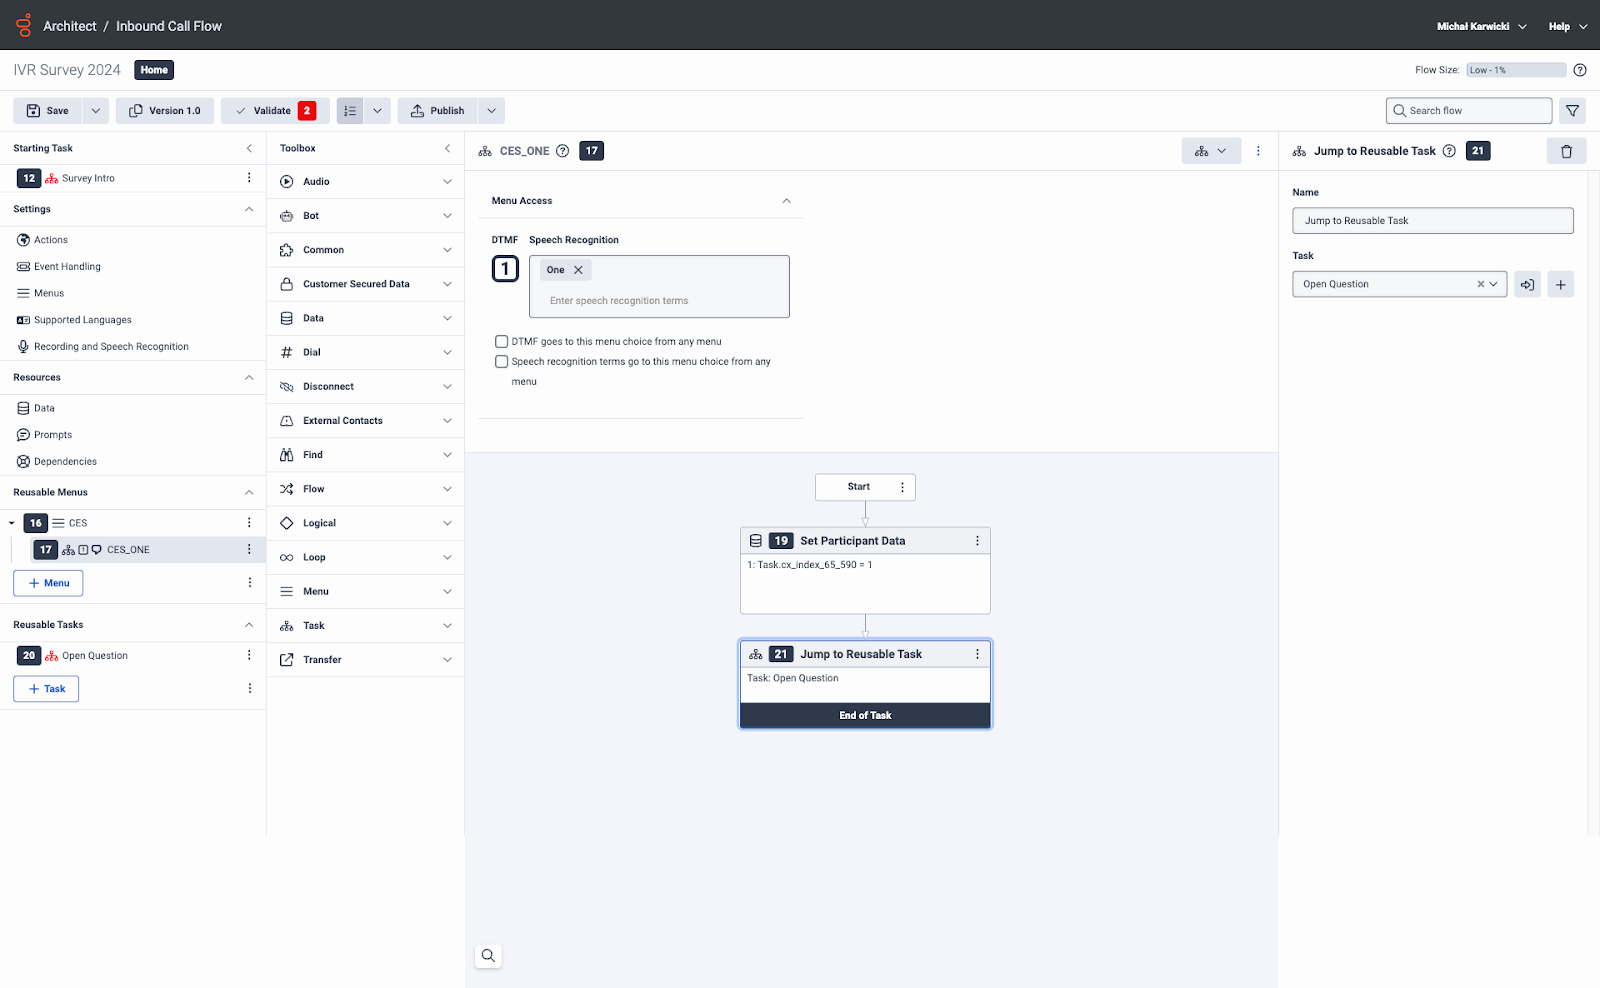
Repeat the same process for the subsequent response options (i.e., CES_Two, CES_Three, CES_Four, CES_Five). You can copy and paste tasks and only change the set participant data to respective value of selection.
You should now add another task to the question menu to add the invalid selection prompt (i.e., CES_Invalid selection). Configure this so that it transfers back to the CES menu.
On the menu, configure the invalid selection as the default menu choice.
In the survey intro, you should add a transfer to the question menu.
Repeat the steps outlined above to add more questions to the survey.
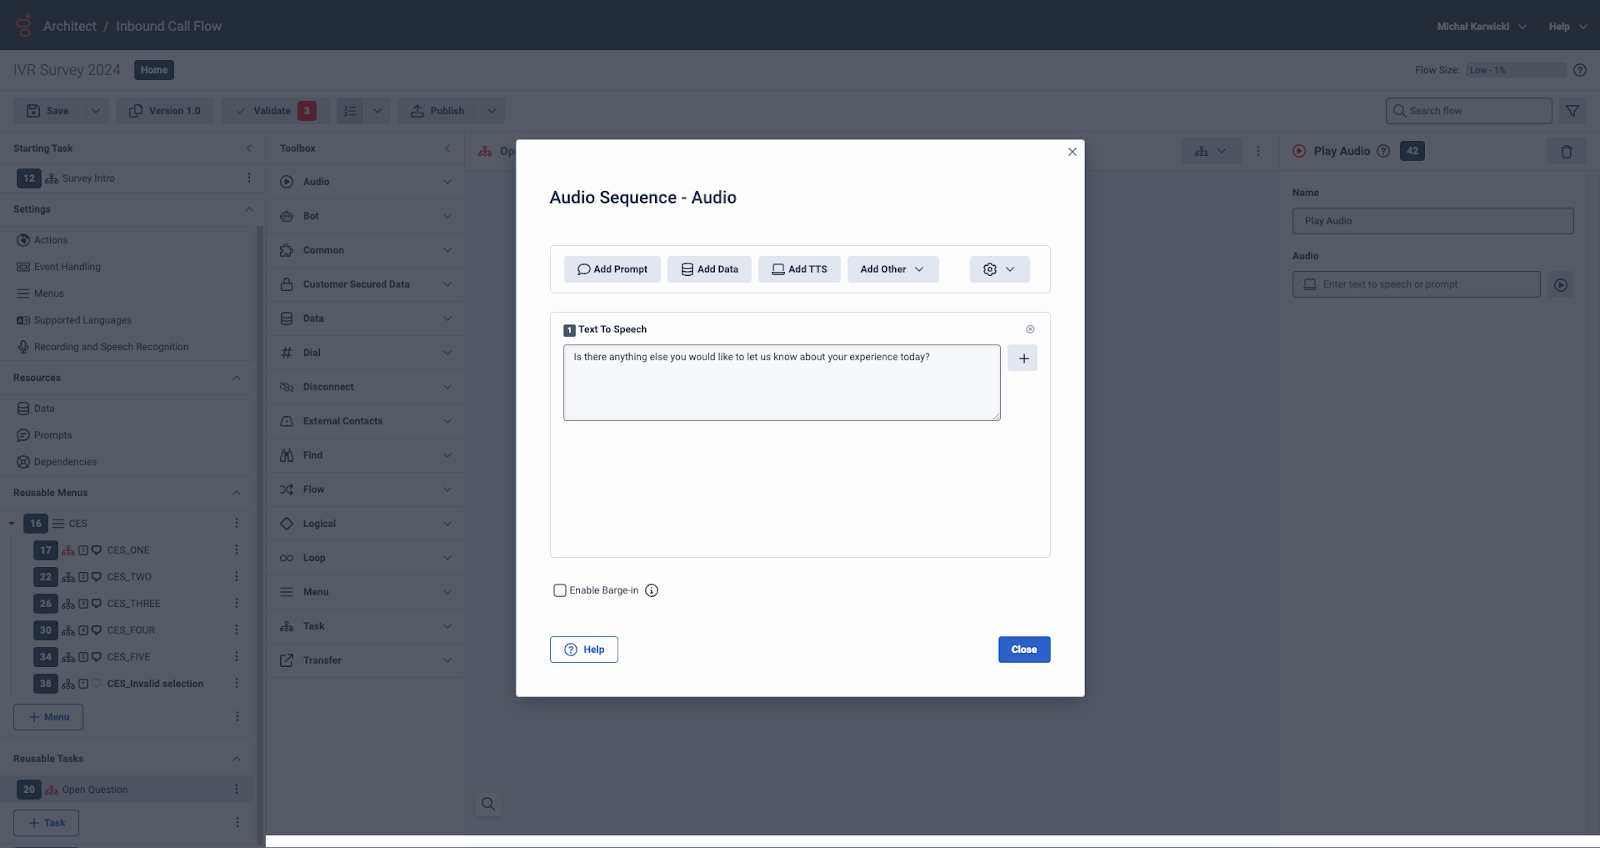
Finally, configure the open ended question itself. Add the Audio Playback with the open ended question.
Add Set Participant Data Block with 2 attributes. See example below:
- Attribute name 1: audio_available
- Value to assign 1: 1
- Attribute name 2: Task.cx_index_65_591_verbatim_start_date
- Value to assign 2: GetCurrentDateTimeUtc()
Add the Enable Participant Recording block and First Detect Silence block.
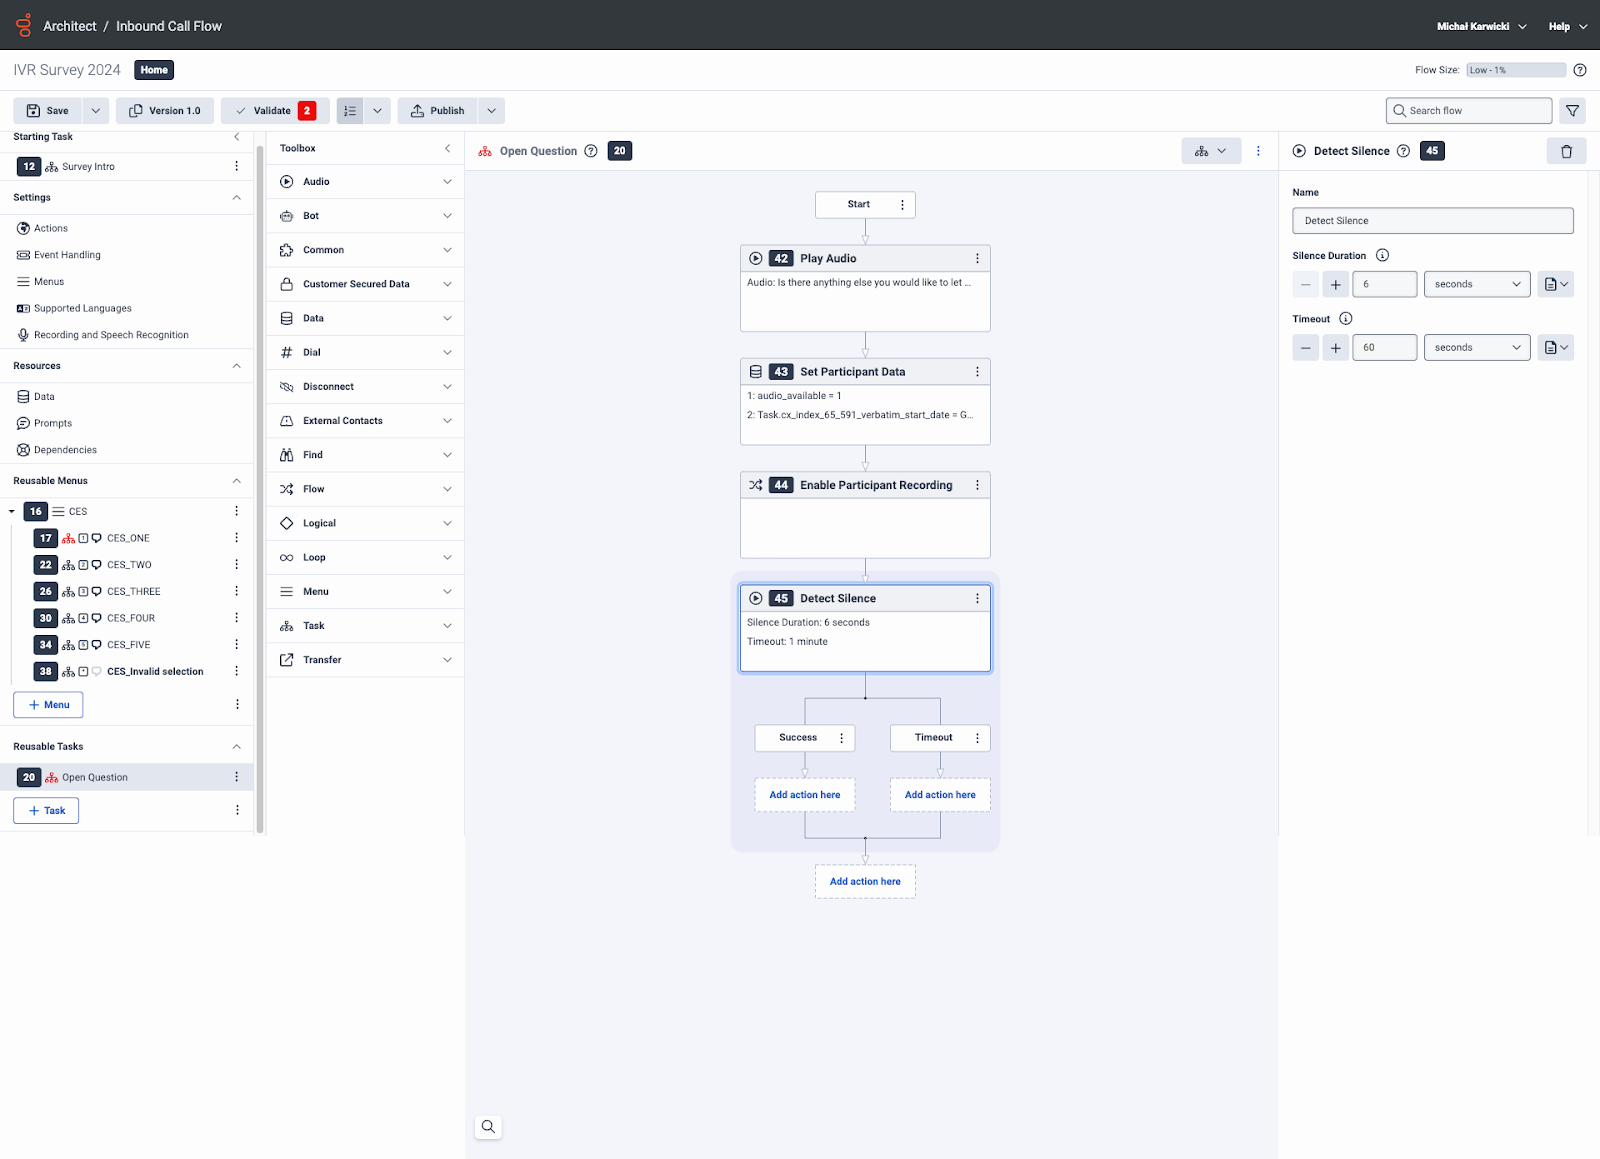
The standard silence detection parameters we recommend setting is 6 seconds of silence duration and 1 minute timeout.
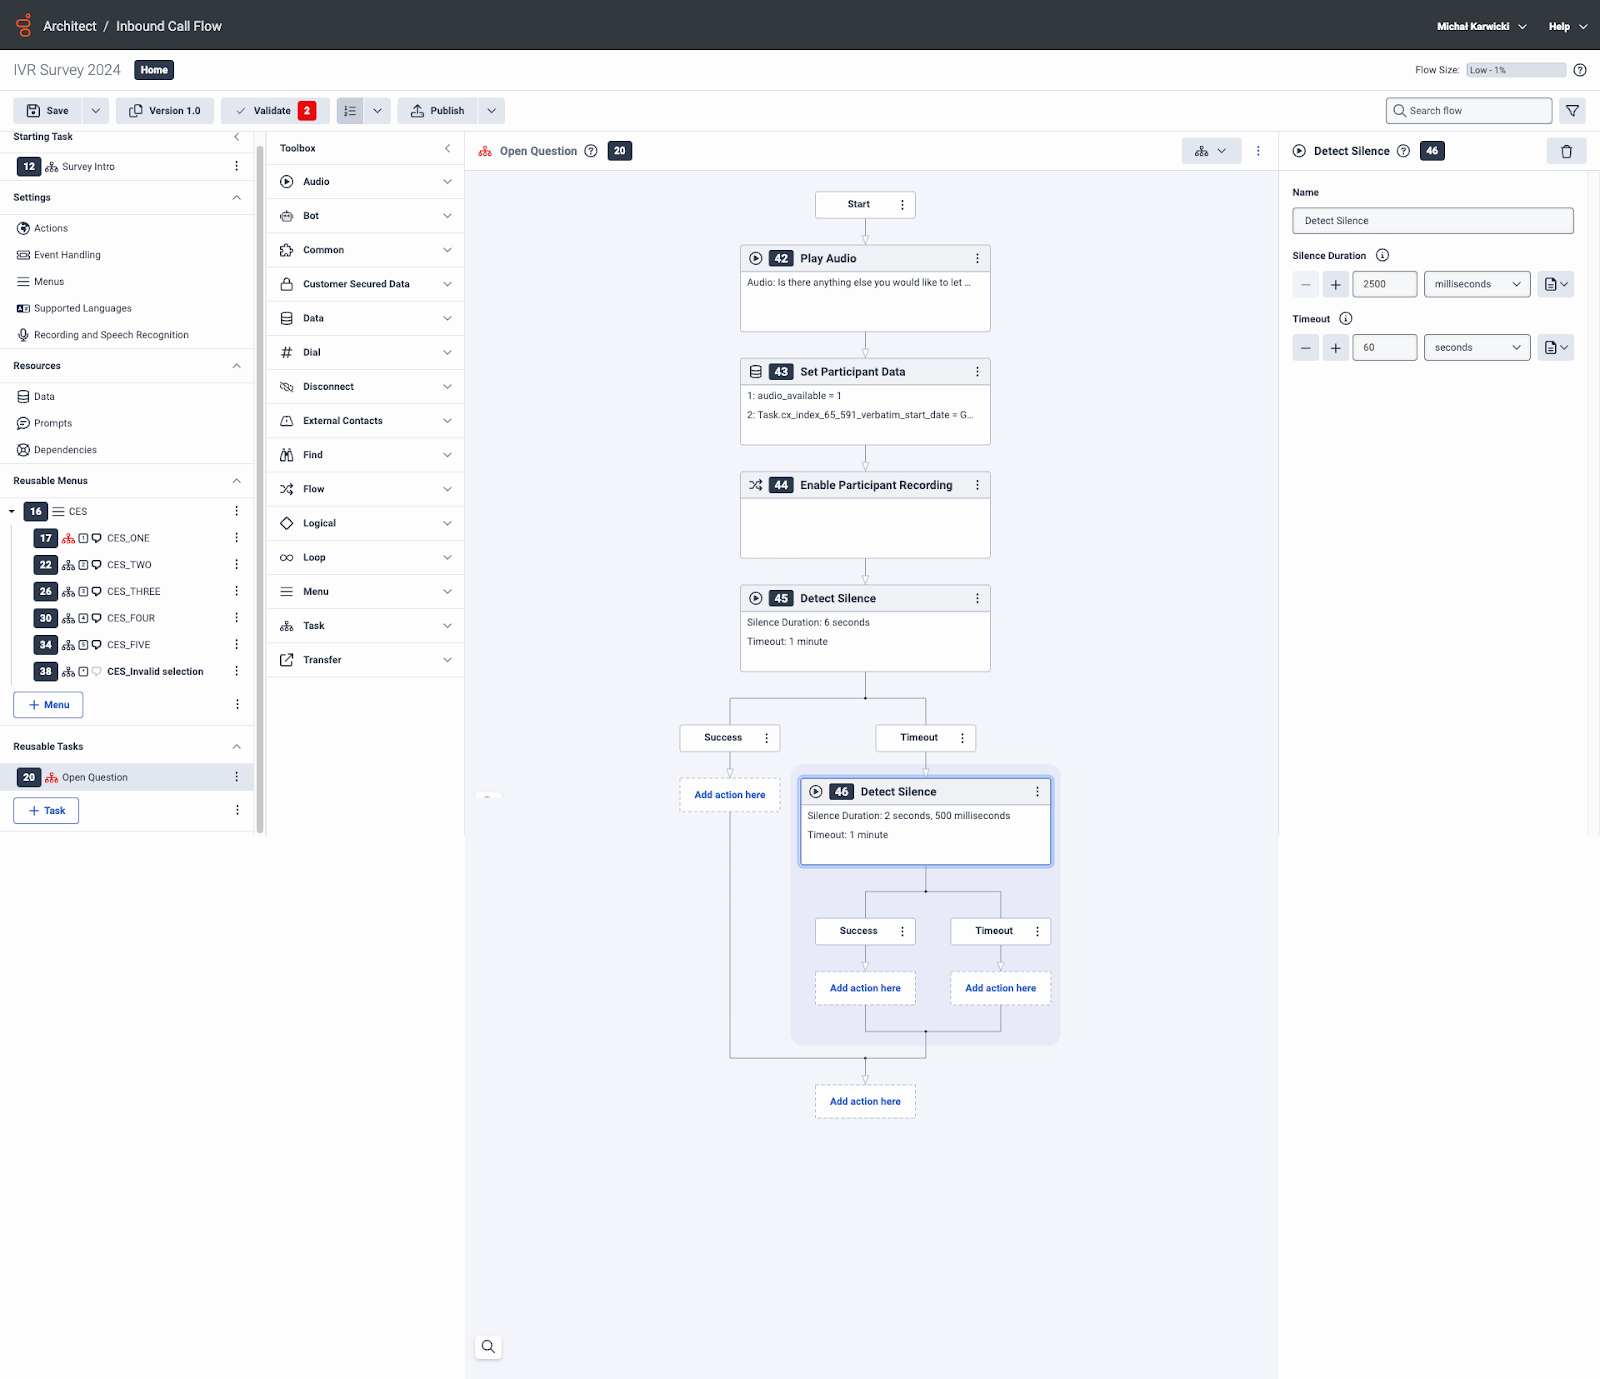
As a timeout to the silence detection, add another detect silence block with a 60 second time and silence duration of 2500 milliseconds
Next, add another set partcipant data block configured with (for example):
- Attribute name 1: Task.cx_index_65_591_verbatim_end_date
- Value to assign 1: GetCurrentDateTimeUtc()
- Attribute name 2: complete
- Value to assign 2: 1
Now you can add your closing/thank you prompt and add the disconnect block.
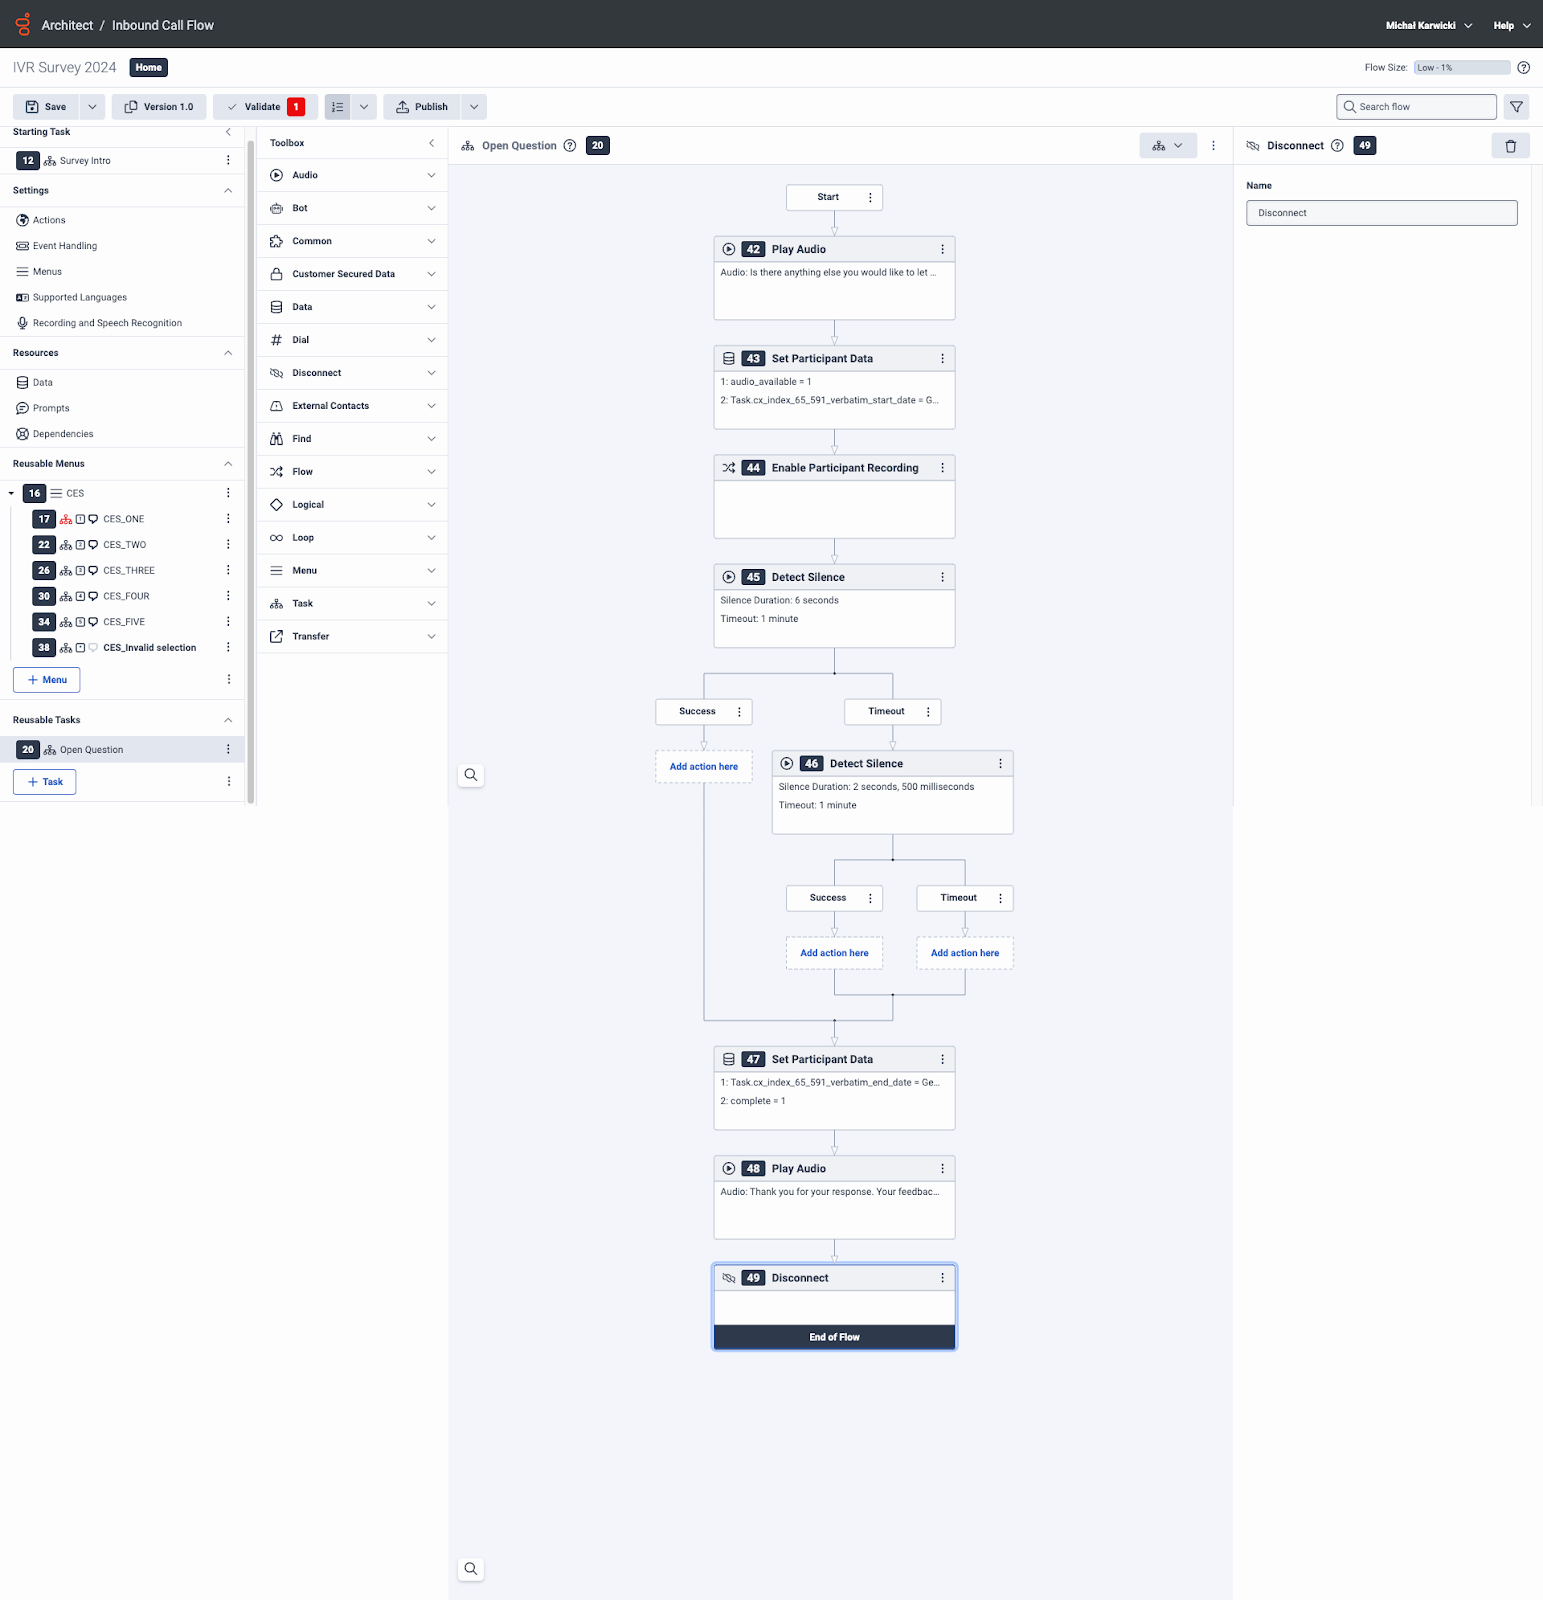
Validate the flow to check for any errors and click publish.
Copy the flow ID and paste it inside the Survey Builder trigger in CX Index on the appropriate survey. This will bind the flow with the CX Index platform.
Step 3: Set up the Genesys Triggers
You have two options for triggering the survey from Genesys
- Script button to transfer to the flow
- Post call survey with Post Flow data action
1. Script button to transfer to the survey
Add a script button that will transfer to the flowID@local host.
2. Post call survey with Post flow data action
On routing url directory/#/admin/routing/ivrs ) select the call flow and the phone number you would like to enable the survey on.
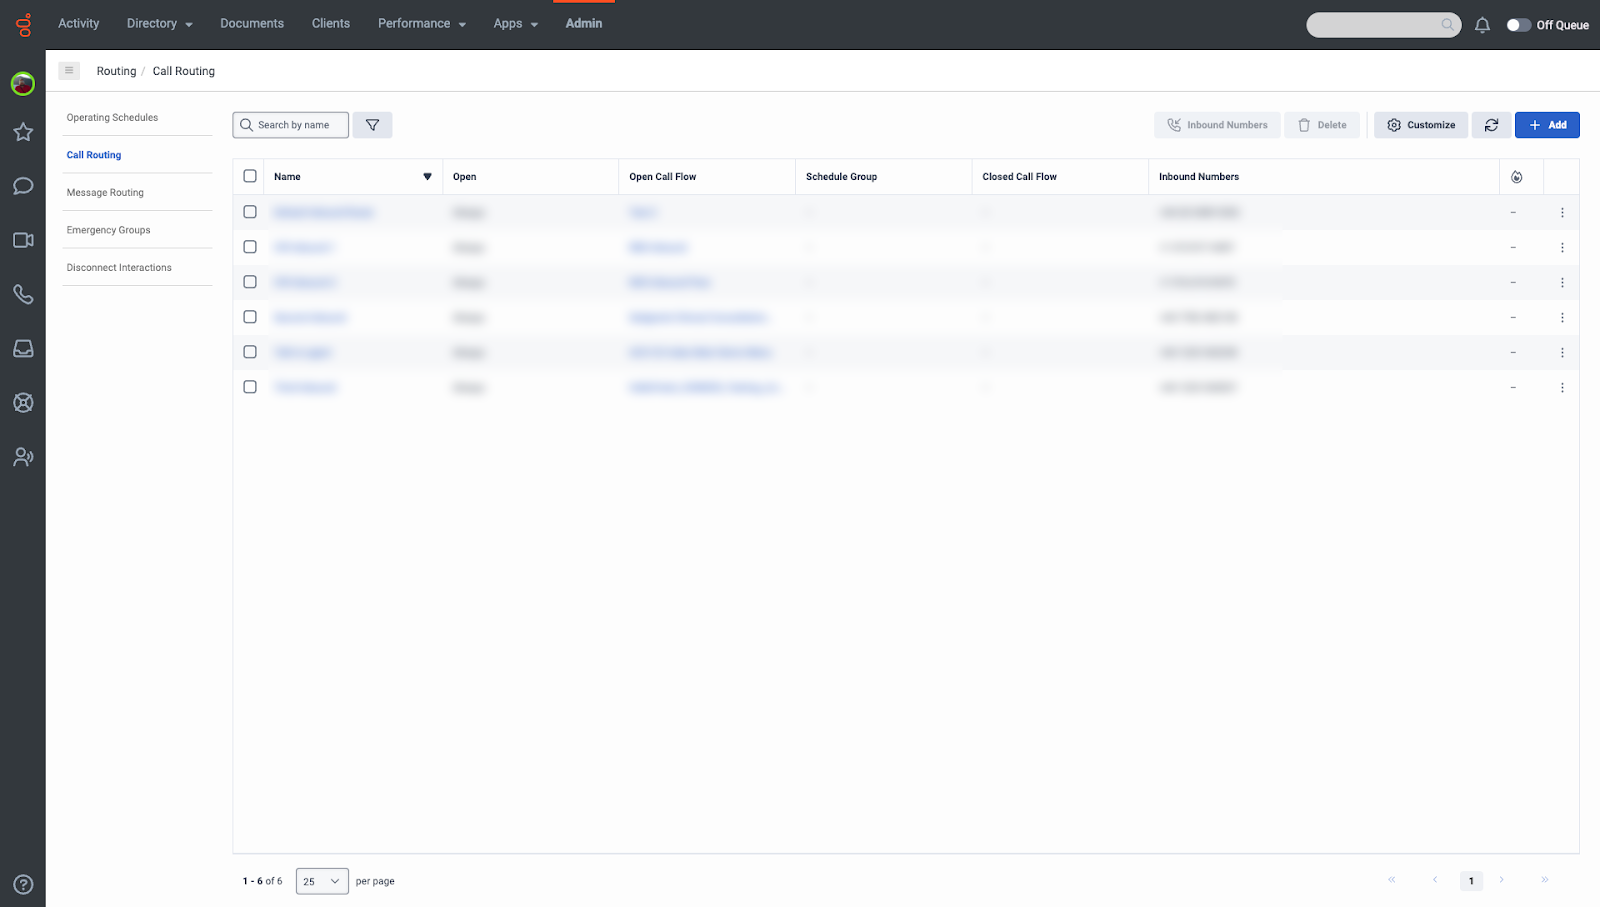
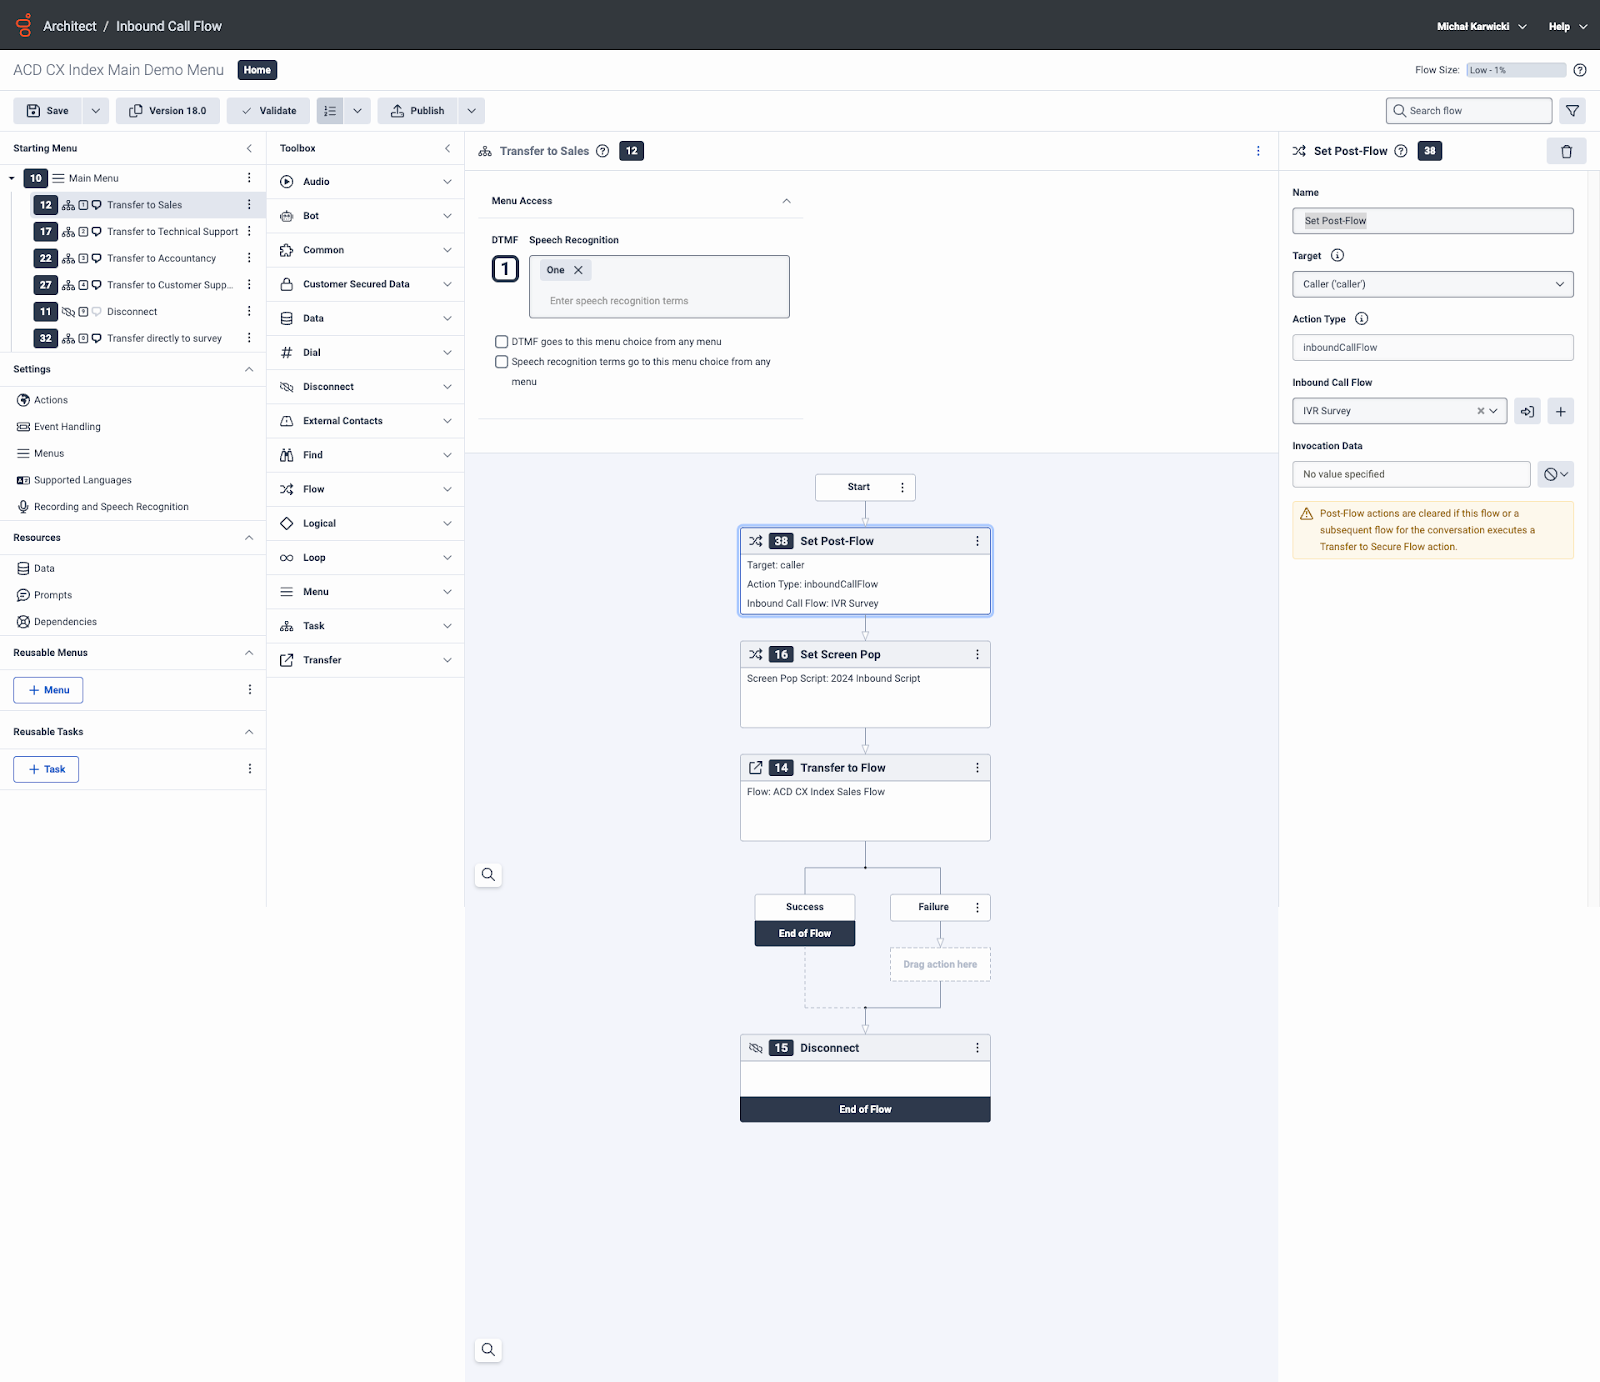
Add the set post flow block anywhere you would like to enable the survey. This could be at the beginning of the flow or before transfer to an ACD block.
Configure the post flow target to the caller.
Below is an example of the Set Post Flow in action:
Method 2: Post Interaction Callback Survey
Step 1: Build an IVR survey within CX Index
Using the steps given in the following articles, create an IVR survey (Create a survey) and add questions (Add questions to a survey). The questions can be used as voice prompts in Genesys Cloud.
When creating the survey, note the survey and question IDs. These will be important when you build the survey flow in Genesys Cloud.
In the configuration stage (Configure a survey), ensure that the Channel field on the General tab is set to IVR.
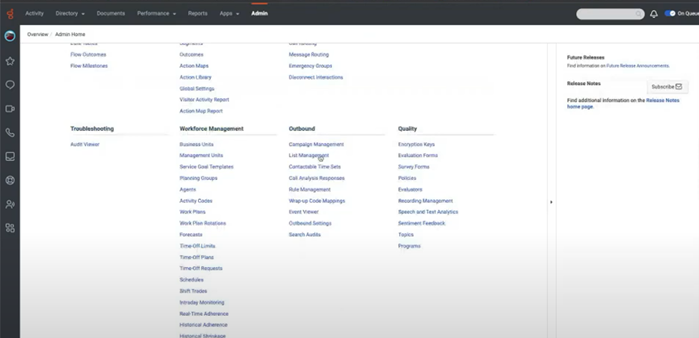
Step 2: Create a contact list
From the Admin page of Genesys Cloud, under Outbound, select Live Management.
Click the Create New button at the top of the page and name the new list in the Contact List Name field.
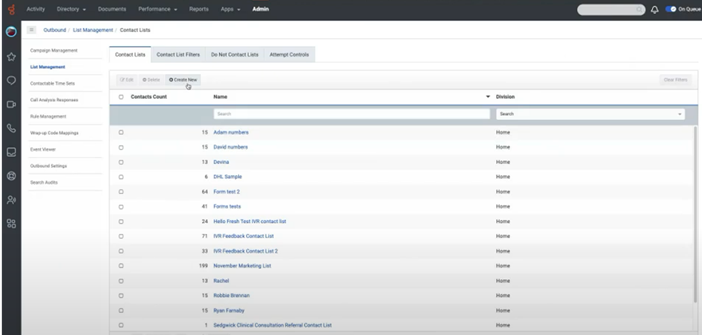
In the Upload Contents from a CSV file field, upload a Comma-Separated Values file, containing the relevant IDs (e.g. interaction_id, agent_id, phone_number, email, etc.).
A sample of the rows appear below. Ensure they are as expected
Under the Contact List Columns headings, you can optionally configure the Type and Time Zone for Phone and Email columns.
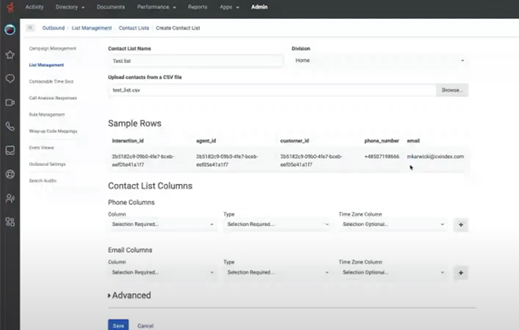
Click the Save button at the bottom of the page. This creates the new contact list.
Step 3: Create a flow for the survey
Create the same Inbound Flow as described in Step 2 of Method 1 above.
From the Admin page of Genesys Cloud, select Architect.
Under the Flows - Outbound Call tab, click the +Add button.
In the ‘Create Outbound Flow’ pop-up window that appears, fill in the Name field as required. Select the newly created contact list from the Contact List dropdown. Select Other from the Default Wrapup Code dropdown. Click the Create Flow button.
From the sidebar on the left of the menu page, under Reusable Tasks, select Add reusable task here and create a new task.
Rename the task by clicking its name at the top of the screen. Call it “Transfer to Prebuilt survey”.
From the sidebar on the left of the menu page, click the three dots to the right of the task name. Select Set this as the starting task.
From the flow chart, click Drag action here >> Toolbox >> Transfer >> Transfer to Flow. At the sidebar on the right of the page, from the Inbound Call Flow dropdown, select the previously created Inbound Flow.
Also at the sidebar on the right of the page, under the Audio heading, enter the voice prompts for Pre-Transfer Audio and Failed Transfer Audio.
From the bottom of the flow chart, click Drag action here >> Toolbox >> Disconnect.
Click Publish above the task title.
Step 4: Configure the campaign
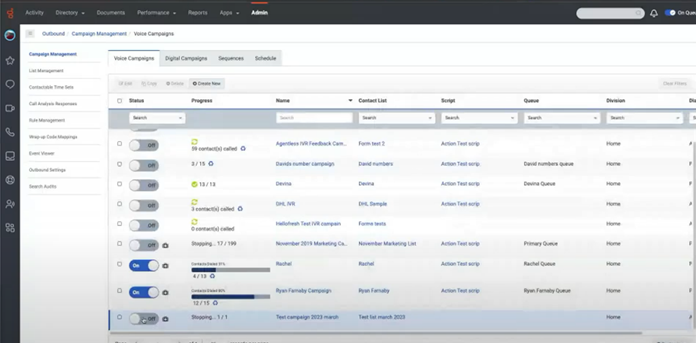
From the Admin page of Genesys Cloud, under Outbound select Campaign Management.
From the sidebar at the left of the page, select Campaign Management.
Fill in the Campaign Name field as required.
Under Dialing Mode Options, fill in the fields as follows:
- Dialing Mode: Agentless Dialing
- Number of Outbound lines: fill in the relevant value
- Dialing Group: Site
- Site: select the relevant field from the dropdown
- Call response: select the relevant field from the dropdown
Under Campaign Options, ensure to select the newly created contact list from the Contact List dropdown.
Configure the rest of the fields based on your organisation’s own unique requirements.
It is important to set the “Always Running” option to Yes.
Click the Save button at the bottom of the page.
The Campaign Management page opens. Find the newly created campaign and set its Status to On by clicking the toggle bar.