Role-based access controls (RBAC) ensure employees access only information they need to do their jobs and prevent them from accessing information that doesn't pertain to them.
RBAC functionality is a core pillar of CX Index. It allows you to fine-tune controls over which users can do what actions. CX Index can also create different views for different tiers of users.
In the CX Index architecture, a person’s role and a person’s group, department or team are separate but related concepts.
What is a role?
A role will determine the level of access that a user has to data within the system. An agent, for example, will only have access to his or her own data. An admin, on the other hand, will have access to data for all teams and users.
In CX Index there are 4 user roles:
- Agent
- Manager
- Administrator
- Super Administrator
Agent
The vast majority of your survey data in CX Index will be attributable to agents, but the agent role has the fewest permissions in CX Index. Agents can only see their own data on the dashboards and can only belong to a single team.
When logging into CX Index, their view is restricted, with limited access to functionality or information.
Manager
Sometimes managers handle calls or interactions with customers, so like agents, managers can also send surveys in CX Index. To enable this, they must be assig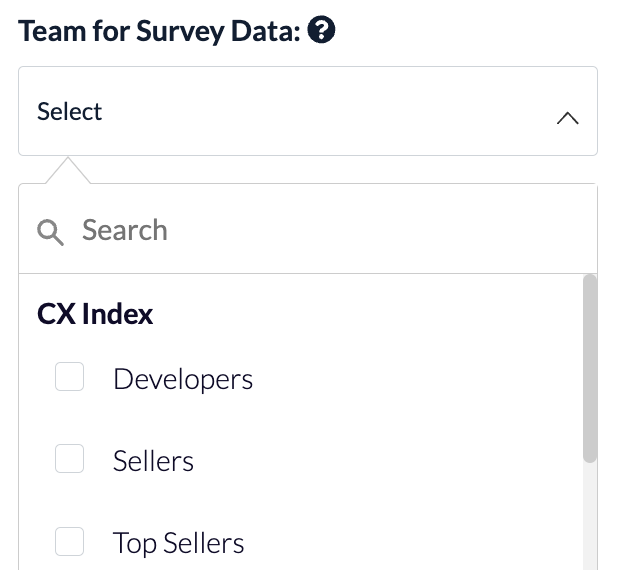 ned to a specific team to which the survey data that is attributable to them will be attached.
If a manager should have survey sending enabled, you must select the team this manager’s survey data should be attributed to under Team for Survey Data in the edit user module. The teams available here are determined by the teams the manager has access to.
If no Team is selected here, you will not be able to collect survey data for this manager.
Admin
Admins have access to all teams, agents, and feedback records.
Super Admin
Similarly to Admins, Super Admins have access to all teams, agents, and feedback records. But Super Admins have additional control over how the platform is managed.
What is User Admin?
User Admin is the area of the CX Index app that allows a permitted user access to the Settings of your organisation’s configuration settings of CX Index.
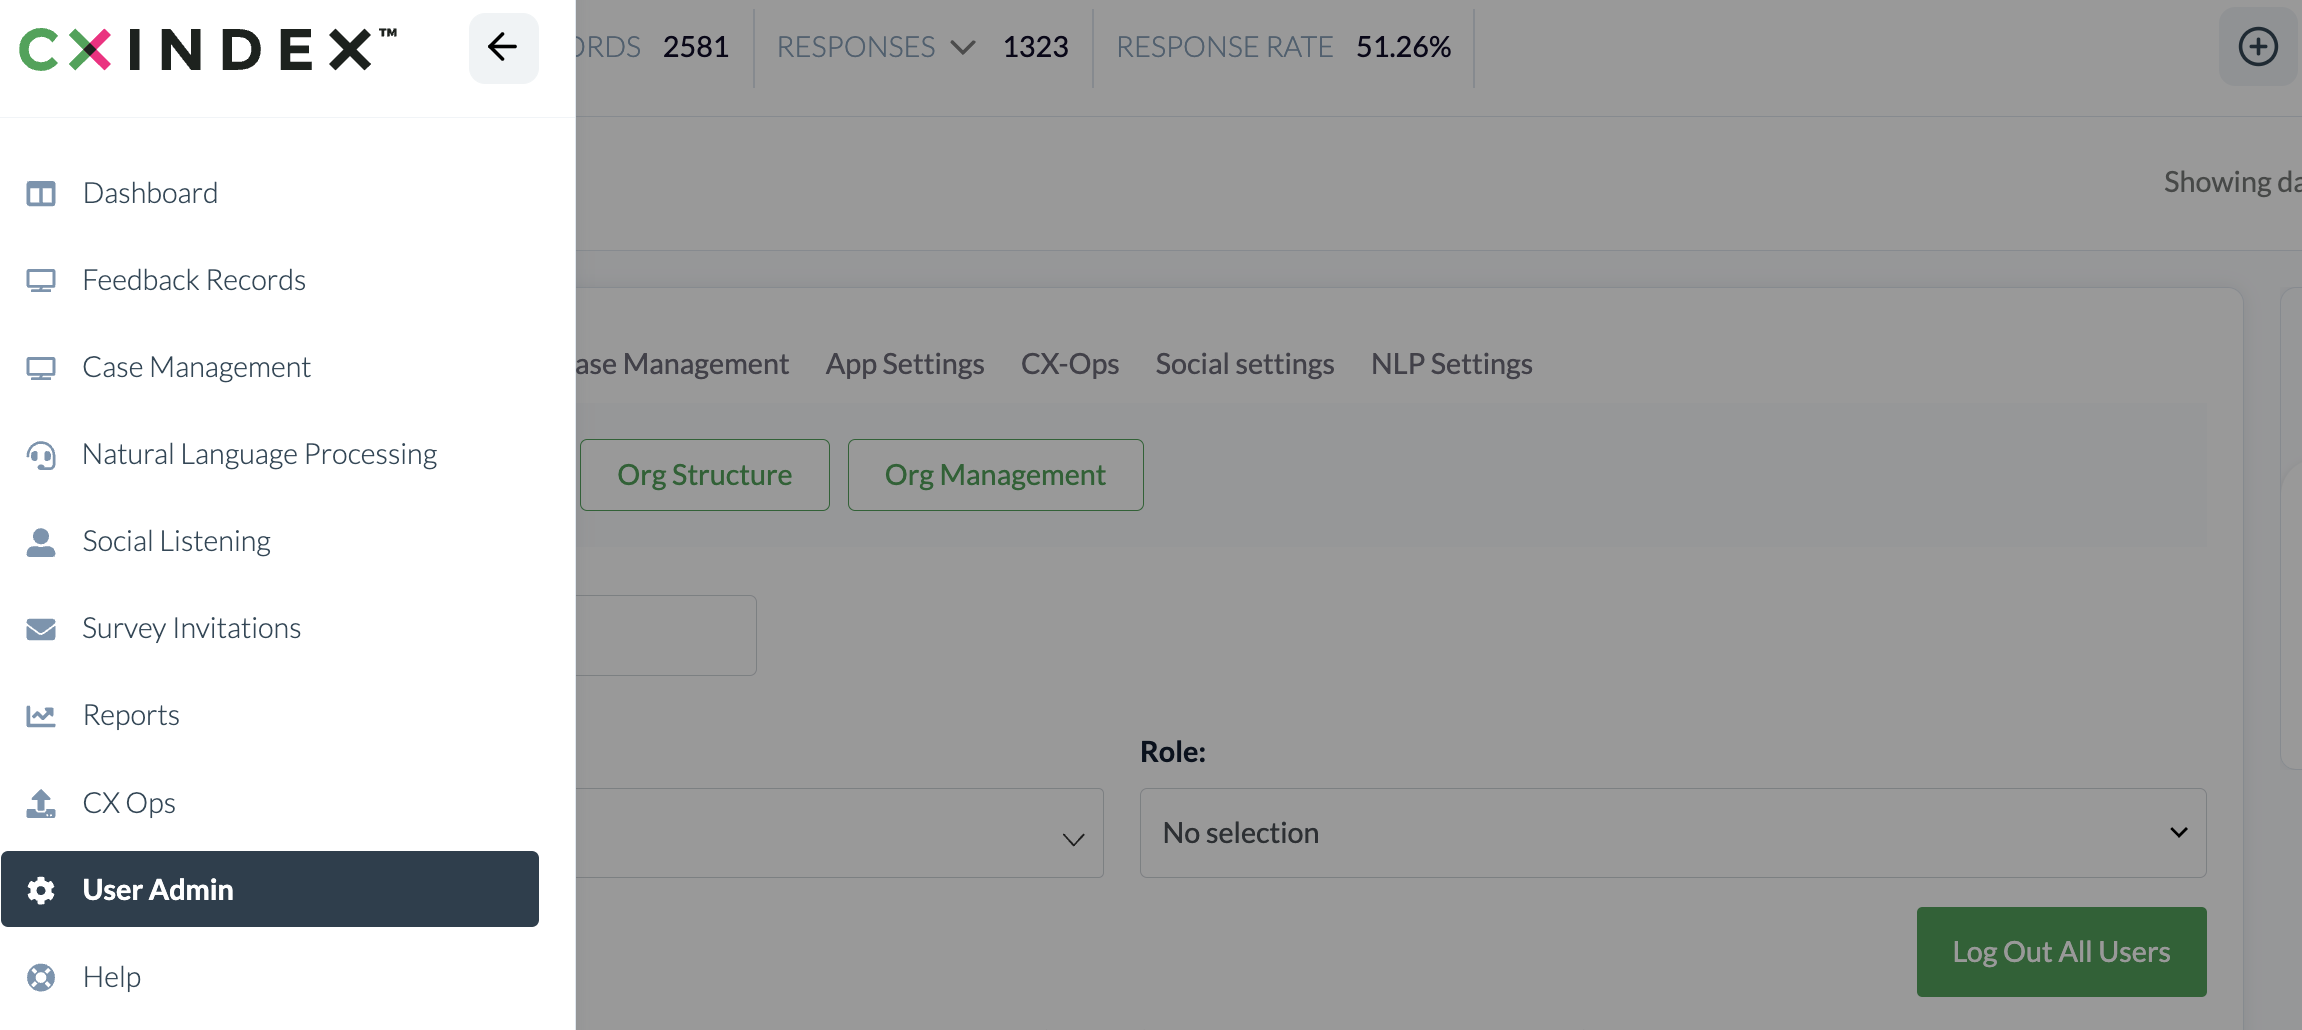
To access User Admin, click the menu icon on the top left corner of your page. Select User Admin.
Of the 4 user roles in CX Index, CX Index stipulates that:
- 2 roles (Agent, Manager) do not have any access to the User Admin area;
- 2 roles (Admin, Super Admin) do have access to the User Admin area.
User Admin Settings
Only Admins and Super Admins can access User Admin.
The following table sets out the Permission Settings to which the different user roles have access.
(A user will only see in User Admin those Permissions for which their role has access).
| Settings Tab |
Setting Name |
Agent |
Manager |
Admin |
Super Admin |
|
Users and Permissions
|
Users |
🚫 |
🚫 |
✔ |
✔ |
|
Permissions Groups |
🚫 |
🚫 |
🚫 |
✔ |
|
|
Org Structure |
🚫 |
🚫 |
🚫 |
✔ |
|
|
Org Management |
🚫 |
🚫 |
🚫 |
✔ |
|
| Parameters |
Metric Settings |
🚫 |
🚫 |
✔ |
✔ |
| Attributes Settings |
🚫 |
🚫 |
✔ |
✔ |
|
| Case Management | Case Creator |
🚫 |
🚫 |
🚫 |
✔ |
| Case Reasons |
🚫 |
🚫 |
🚫 |
✔ |
|
| Custom Case Fields |
🚫 |
🚫 |
🚫 |
✔ |
|
|
App Settings |
Client App Settings |
🚫 |
🚫 |
🚫 |
✔ |
| General Phone Settings |
🚫 |
🚫 |
🚫 |
✔ |
|
| NLP Settings |
🚫 |
🚫 |
🚫 |
✔ |
|
|
ETL |
🚫 |
🚫 |
🚫 |
✔ |
|
| Global Features |
🚫 |
🚫 |
🚫 |
✔ |
|
| Integrations |
🚫 |
🚫 |
🚫 |
✔ |
|
| Logs |
🚫 |
🚫 |
🚫 |
✔ |
|
| Customers |
🚫 |
🚫 |
🚫 |
✔ |
|
| CX-Ops | Templates |
🚫 |
🚫 |
🚫 |
✔ |
| Fields |
🚫 |
🚫 |
🚫 |
✔ |
|
| Upload |
🚫 |
🚫 |
🚫 |
✔ |
|
| Social settings | Integrations |
🚫 |
🚫 |
🚫 |
✔ |
How Groups work
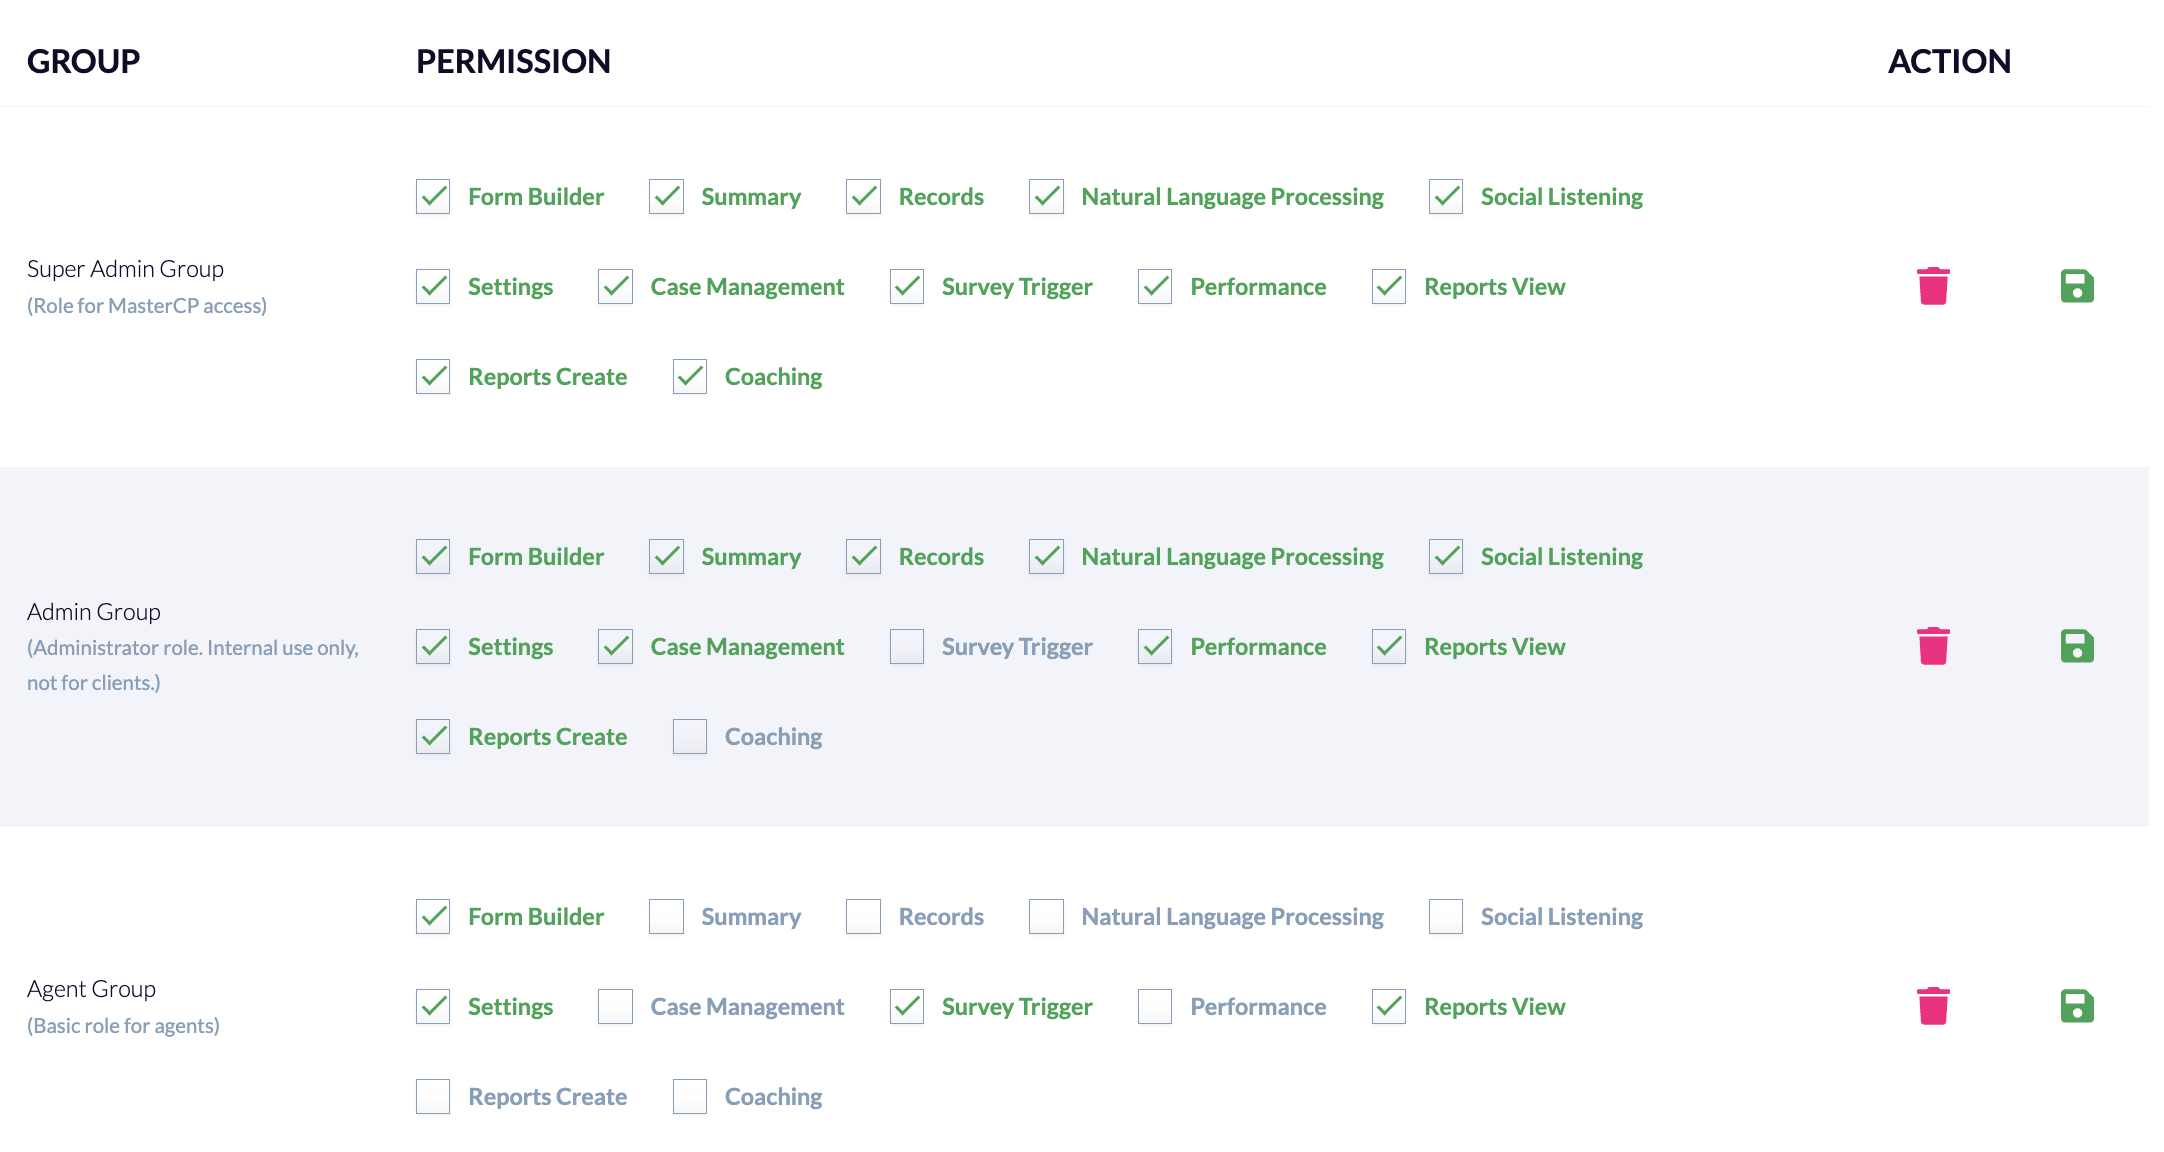
While a user’s Role determines what permissions settings they can access, the Group they belong to determines what functionality you’d like your users to see upon logging into CX Index.
Groups give you powerful flexibility in your role based access controls.
Groups enable you to customise available functionality of your pre-defined Group. Enabling you to allow one Group of users access to certain functionality, but not to others.
You might, for example, have a group of users whom you’d like to have access to case management, but it isn’t relevant for other users. You can therefore create a group of Case Management Users, and assign the users to that group who will be able to view and handle cases. Users who do not belong to the group with Case Management selected will not be able to access Case Management in the app’s navigation.
Adding a User to a Group
Once you’ve created your Group, you can then go to the Users tab, where you add users to your Group.
It’s important to remember that you add individual Users to a Group (and not Teams to a Group).
If you’re adding a new User, click the Add New User button on the right side of the page.
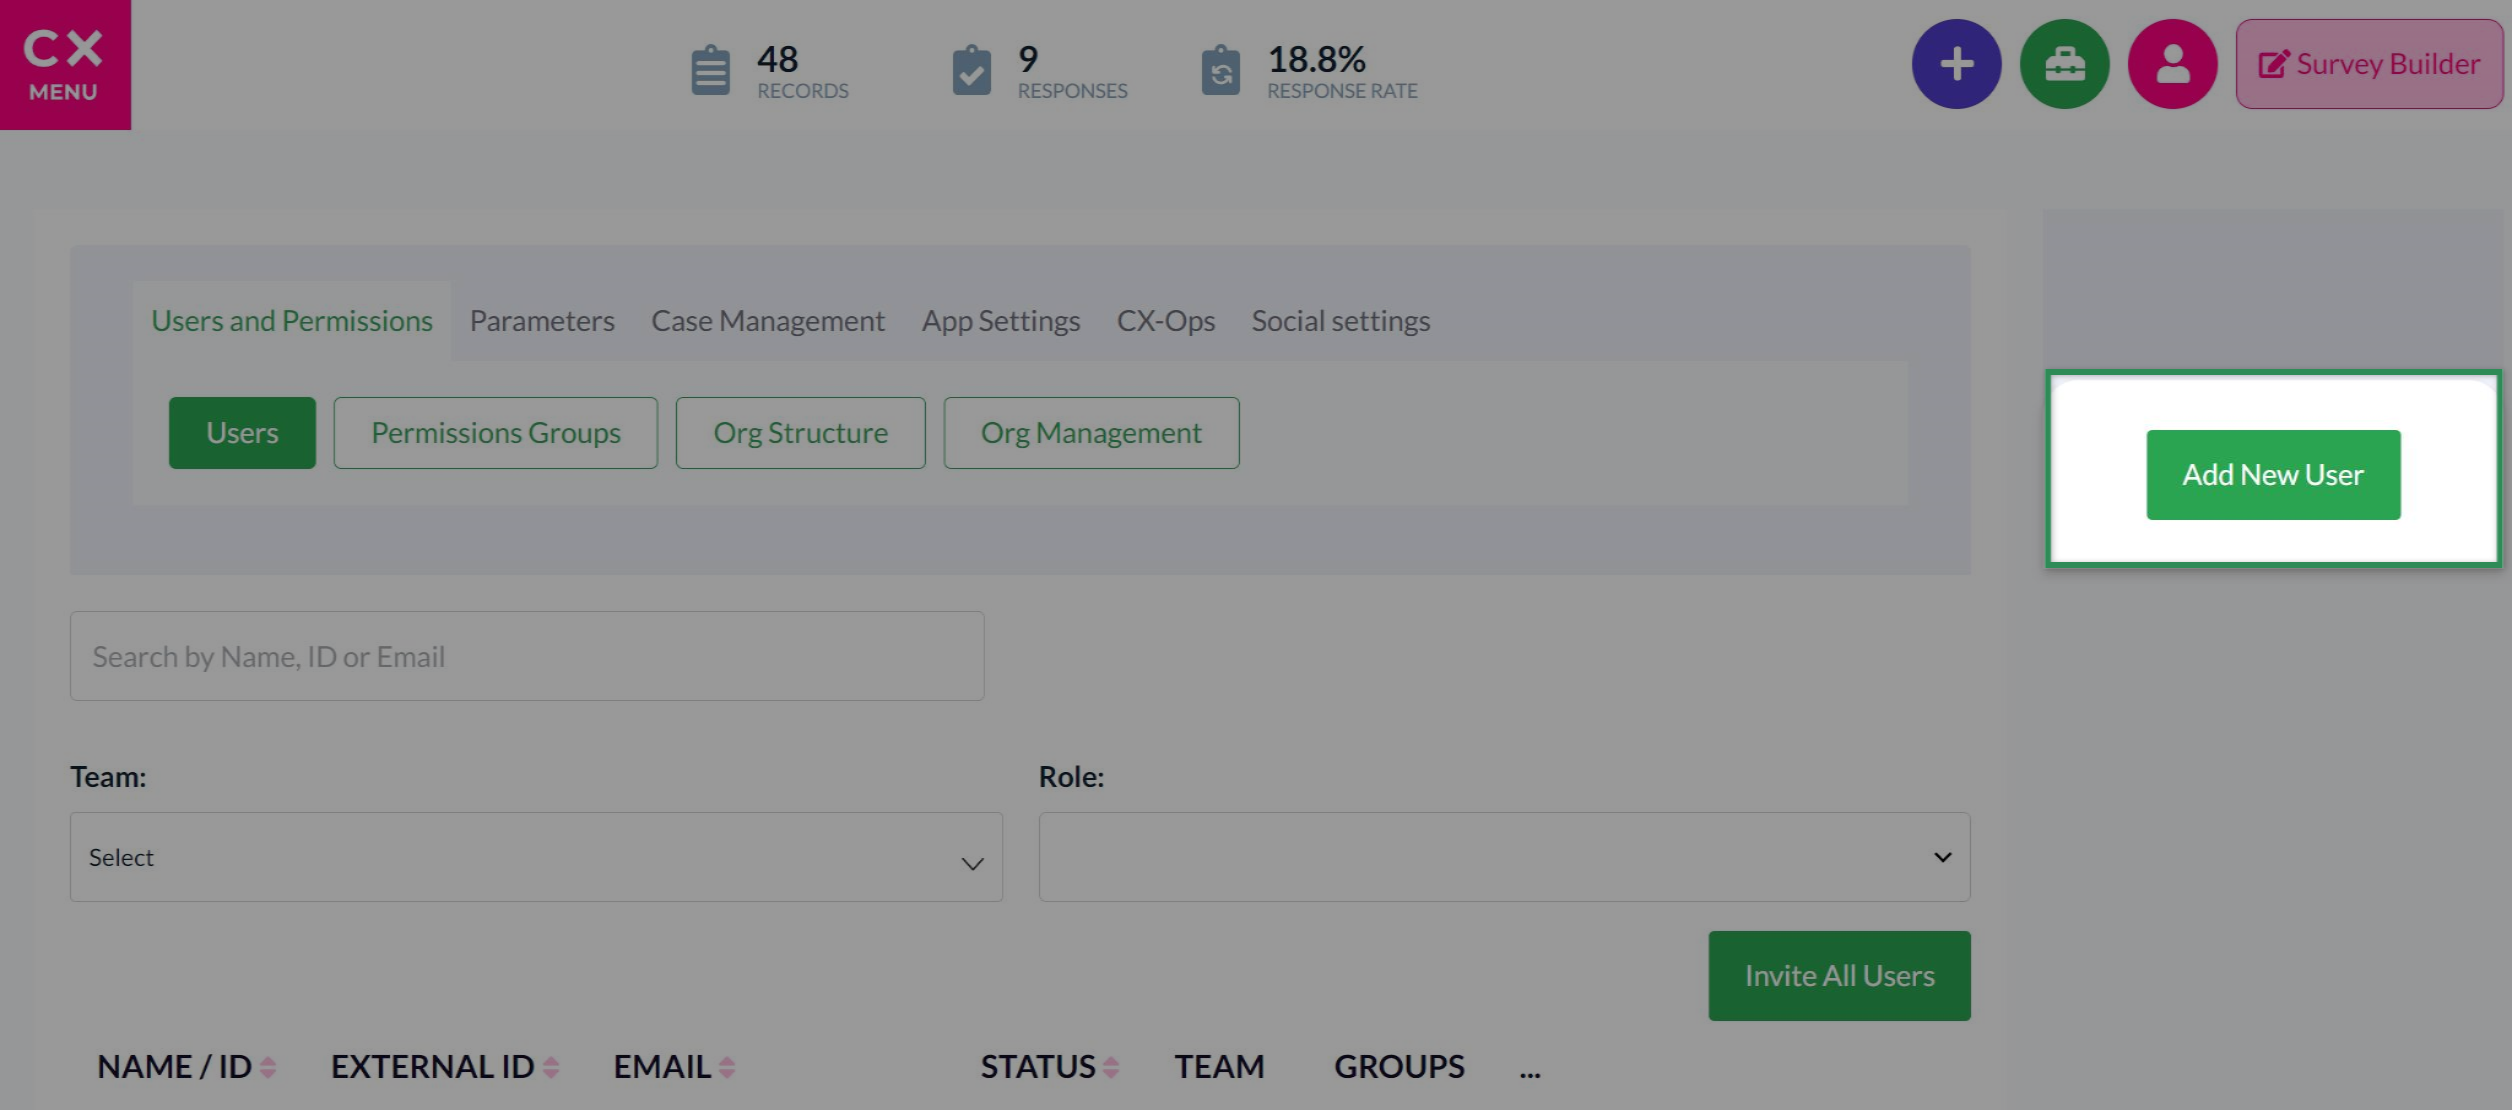
Select the Team and Group to associate with that user.
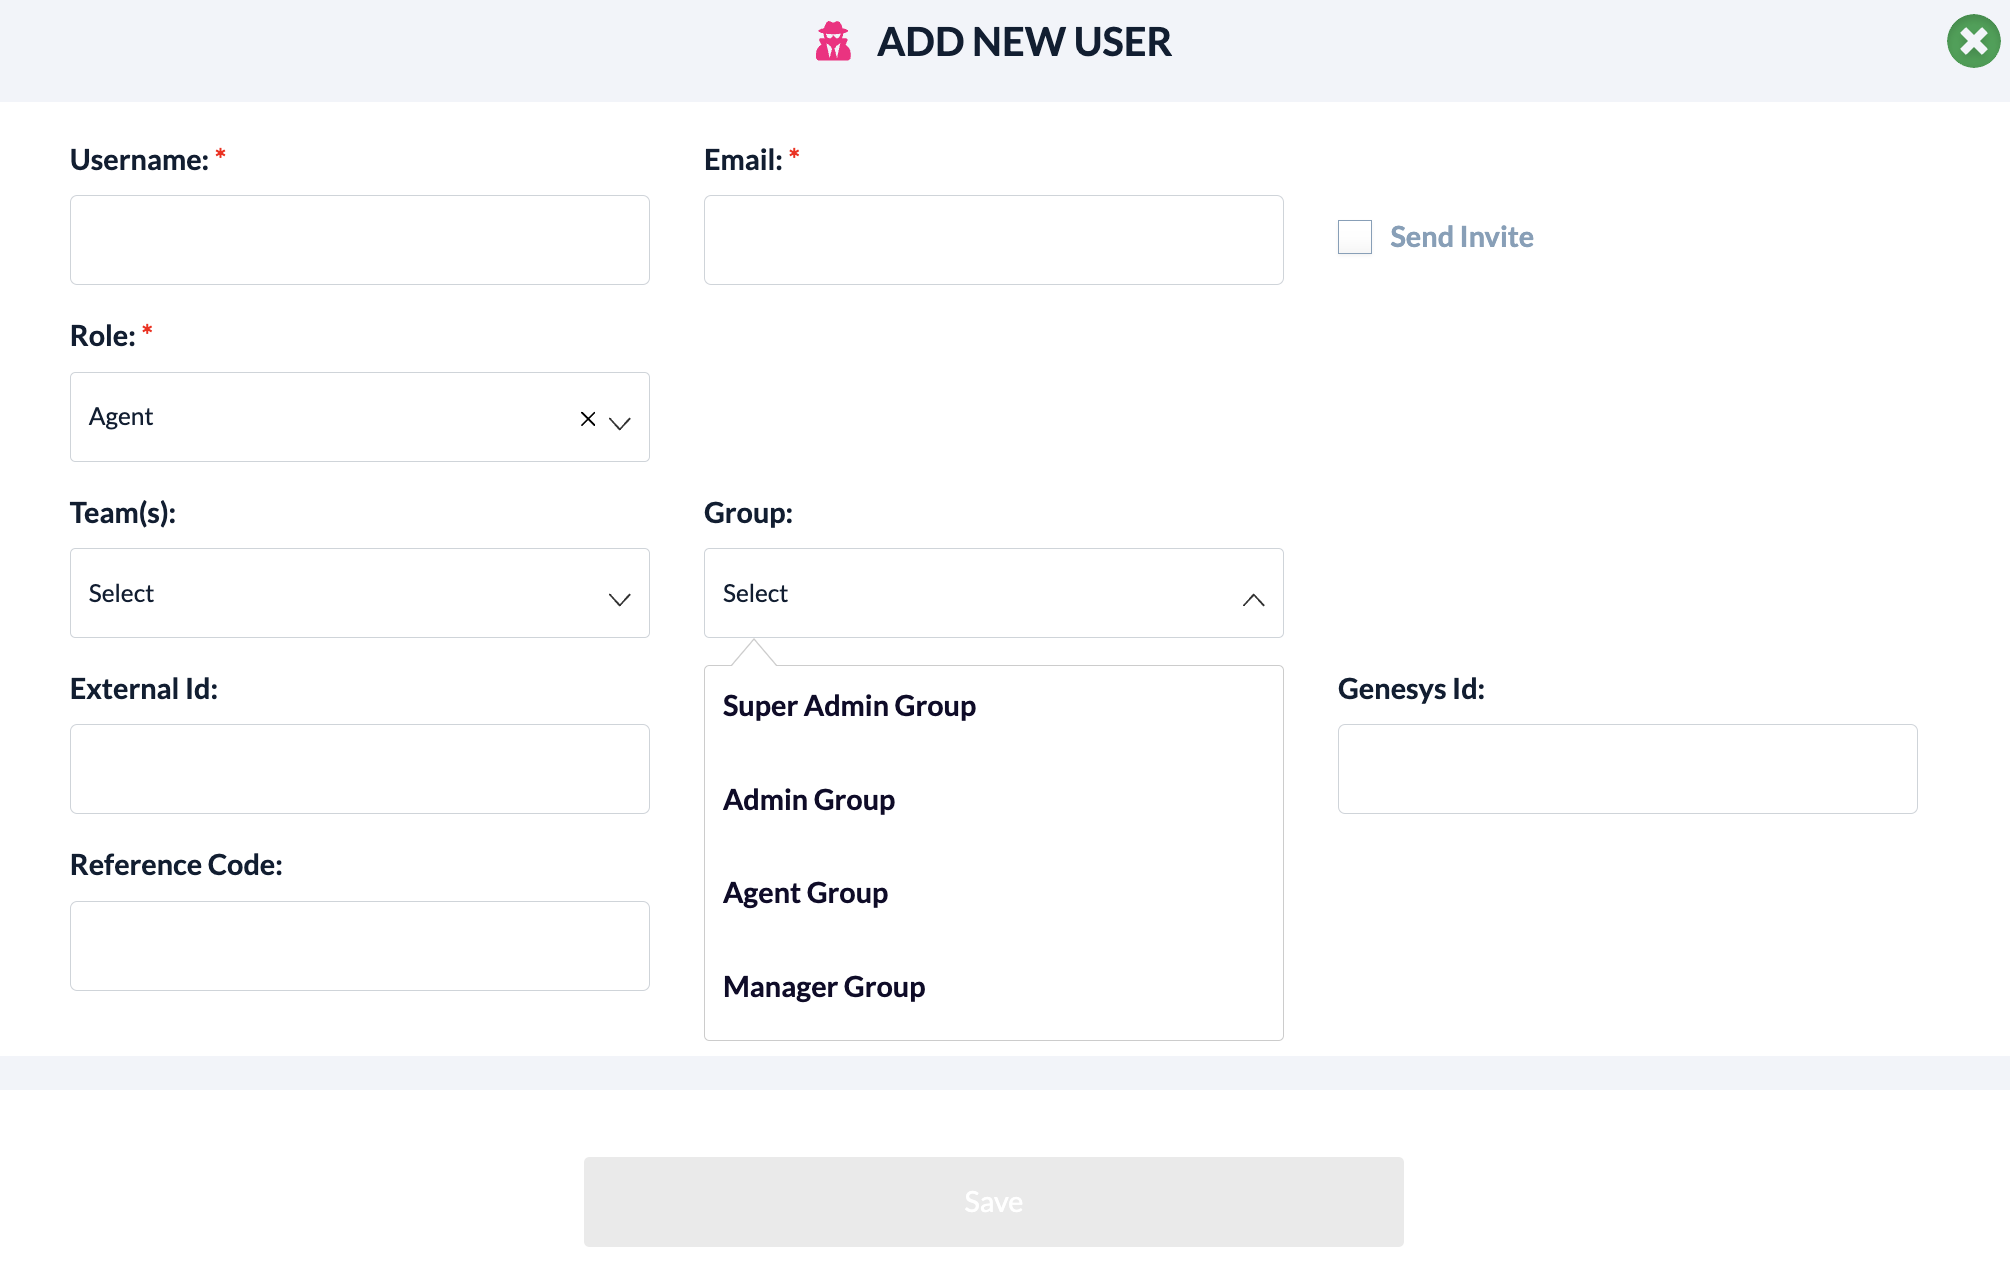
Click the Save button to save all the details you’ve inputted.
Org Management
The Org Management tab displays a list of all teams within your organisation, and the surveys they have access to.
To edit which surveys a team can access, find the team you want to edit within the Org Management tab.

Click the down arrow to view the dropdown list of surveys.
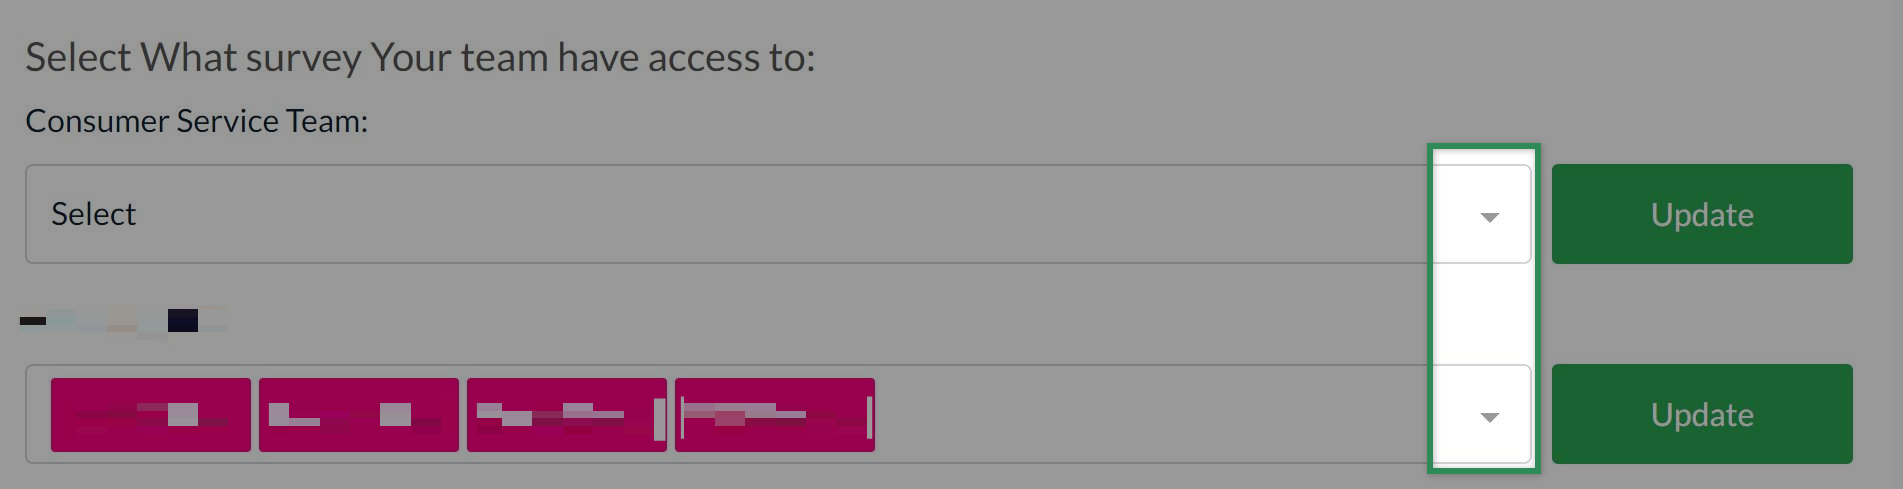
Determine survey access by checking/unchecking the relevant checkboxes.

Click the Update button to the right of the team.

What is a Department?
A department is essentially a label for the top level team in the CX Index architecture. We also refer to them as Parent Teams.
It is the level 1 team, to which sub-entities (a child entity) can belong.
So e.g. a supermarket using CX Index to track feedback might create two Departments:
- Department 1: The Frozen Food Department
- Department 2: The Fresh Produce Department
What is a Team?
In the CX Index architecture, we call a sub-entity a Team.
A Team is a child entity of a level 1 team (or Department).
An Admin can:
- Create a Team under Users
- Add a user to that Team
- Remove a user from that Team
- Determine which Surveys the Team has access to (by adding or removing Survey access under Org Management)
User Hierarchy
- A Manager of a Team will see and have access to all users in that Team and any Sub-Teams below.
- A Manager of a lower level Team, who is not a Manager of a higher level Team, will only have access to their lower level Team.
Example Groups, Departments & Teams Creation
In our supermarket example, the supermarket might create (child) sub-entities below the (parent) Department level, for different specialist Teams in the supermarket:
The Frozen Food Department might have 2 specialist teams:
- The Pizza Team
- The Desserts Team
The Fresh Produce Department might also have 2 specialist teams:
- The Fruit Team
-
The Vegetables Team
If the Fresh Produce Department is having a bumper year, they might need to create additional (child) sub-entities beneath the Fruit Team and the Vegetables Team, specialising further:
Department |
Fresh Produce Department |
Fresh Produce Department |
and
Department |
Fresh Produce Department |
Fresh Produce Department |
Not to be outdone by their colleagues in Fruit & Vegetables, the Frozen Food Department may also need to cater for their sales growth by creating additional specialist (child) sub-entities beneath the Pizza Team and the Desserts Team
Department |
Frozen Food Department |
Frozen Food Department |
and
Department |
Frozen Food Department |
Frozen Food Department |
So here we have:
- 2 top level Departments
- 4 sub-entity Teams, immediately below the 2 top level Departments
- 4 additional sub-entity Teams, immediately below the mid-level Teams above
We might create the following Groups, with different Roles assigned to them, to allow for the functionality flexibility those different Teams require in terms of system usage:
- Thick Crust Group (Agent Role)
- Thick Crust Group (Agent Role)
- Frozen Food Group (Manager Role)
|
Group Name |
Group Role |
Users Need |
Give Group Access to |
|
Thick Crust |
Agent |
The Thick Crust Team needs to have access to case management, and the ability to trigger surveys manually. |
|
|
Thin Crust |
Agent |
The Thin Crust Team don’t need case management, don’t need the ability to trigger surveys manually, but do need access to Social and Natural Language Processing. |
|
|
Frozen Food |
Manager |
Managers in the Frozen Food Department need access to all the functionality that their Teams access |
|